
Power Outage Preparedness: What to Do Before, During, and After the Lights Go Out
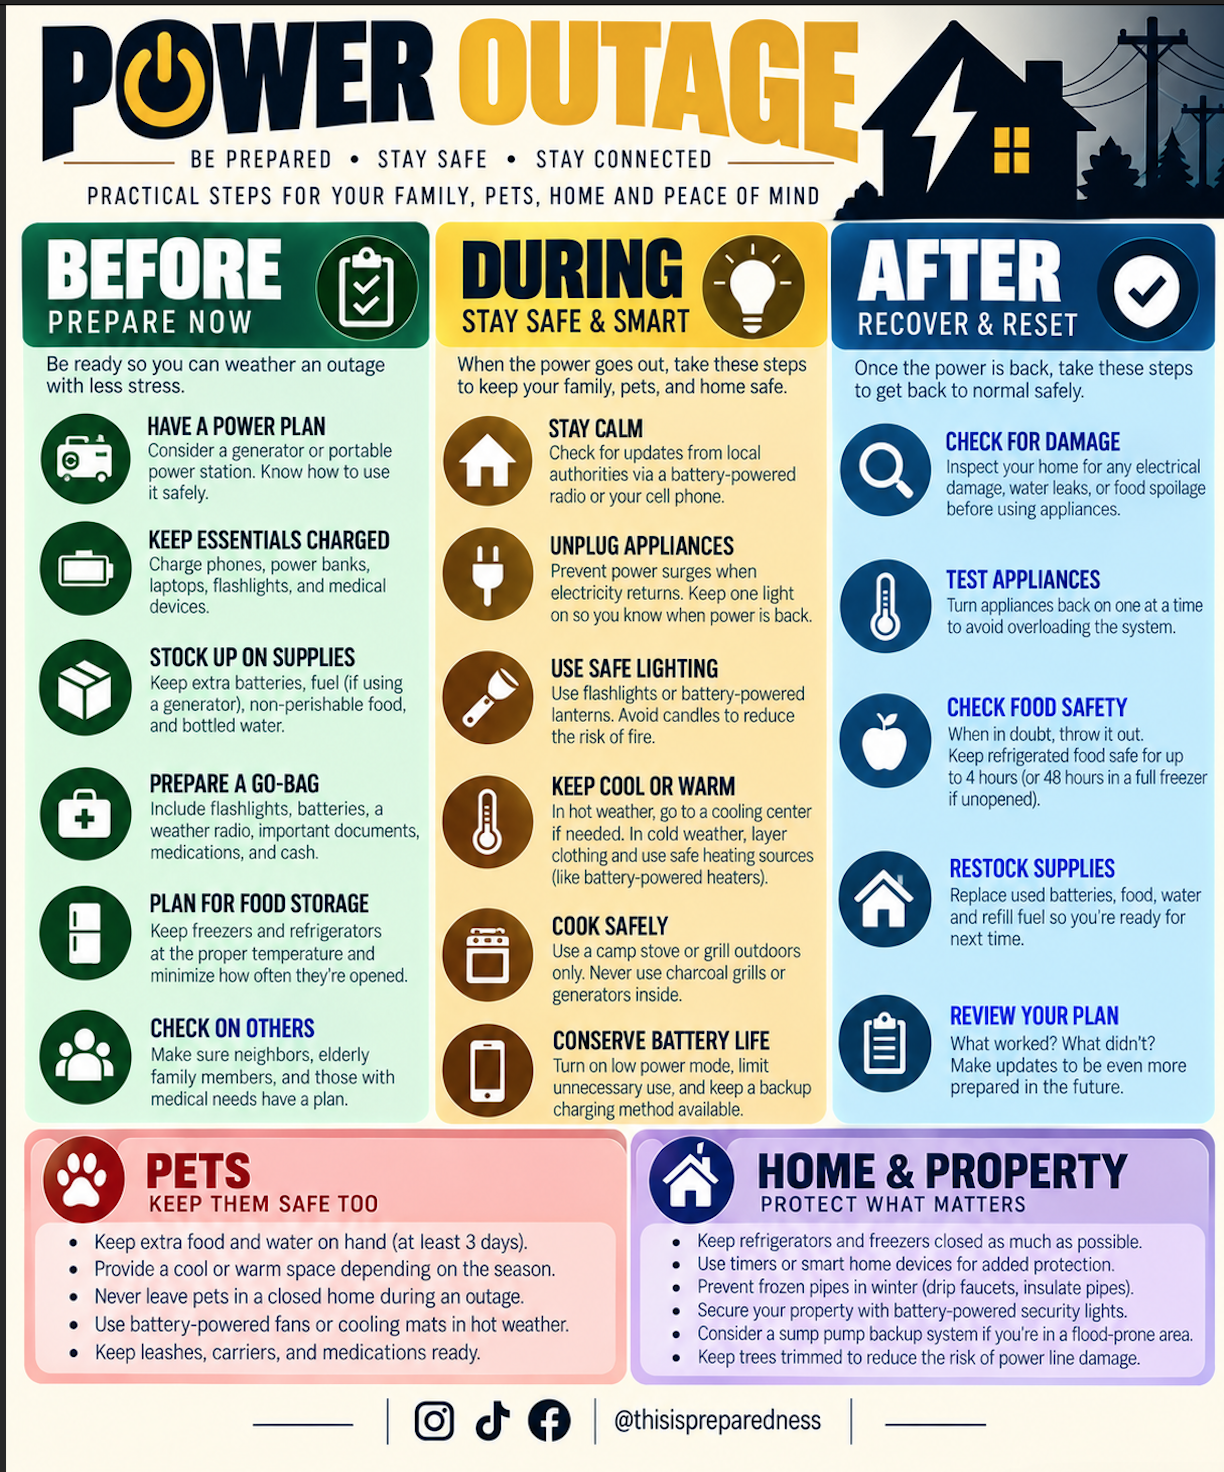
Power outages happen for all kinds of reasons: extreme heat, thunderstorms, hurricanes, winter storms, wildfires, equipment failures, accidents, or an overwhelmed electrical grid.
Sometimes the electricity returns within minutes. Other outages can last hours—or days.
And once the lights go out, the problem isn't simply that you can't watch television or charge your phoneA prolonged outage can affect your home's temperature, refrigeration, medical equipment, communication, cooking, security, water systems, pets, and your ability to receive important emergency information.
That's why every household should have a basic power-outage plan. The goal isn't to prepare for every imaginable scenario. It's to make your family more comfortable, capable, and safe when something ordinary suddenly stops working.
BEFORE: Prepare While the Power Is On
Start with lighting. Every household should have flashlights or battery-powered lanterns that family members can find easily in the dark. Keep extra batteries available and periodically check that your equipment still works.
Next, think about power. Keep rechargeable power banks charged and consider what devices are truly essential during an extended outage. Phones may become your primary source of communication and emergency information, so preserving battery life matters.
If someone in your household relies on electrically powered medical equipment, develop a specific backup-power and evacuation plan rather than relying solely on your general emergency supplies.
Your outage supplies should also include drinking water, shelf-stable foods that require little or no cooking, necessary medications, basic first aid supplies, sanitation items, pet supplies, and a battery-powered or hand-crank radio.
Protect Your Refrigerator and Freezer
Food safety becomes increasingly important as an outage continues. Keep refrigerator and freezer doors closed as much as possible. Every time they're opened, cold air escapes.
As a general rule, an unopened refrigerator can keep food cold for about four hours. A full freezer can generally maintain its temperature for about 48 hours, or approximately 24 hours if it is half full, provided the door stays closed.
A refrigerator/freezer thermometer can remove some of the guesswork when you're deciding whether food remained at a safe temperature. And remember the old rule: when in doubt, throw it out. Never taste questionable food to determine whether it's safe.
DURING: When the Lights Go Out
First, determine whether the outage is limited to your home or affecting the surrounding area. Check your electrical panel if it's safe to do so, then look for information from your utility company or local emergency officials.
Unplug sensitive electronics and appliances that could be damaged when electricity is restored. You can leave one light switched on so you'll know when power returns.
Use flashlights and battery-powered lanterns whenever possible instead of candles. Open flames introduce an unnecessary fire hazard, particularly when people are already navigating a dark home.
Then conserve your resources. Reduce unnecessary phone use, switch devices to low-power mode, and avoid repeatedly opening refrigerators and freezers.
Extreme Temperatures Change the Situation
A power outage during mild weather can be uncomfortable. A power outage during extreme heat or cold can become dangerous.
If your home is becoming dangerously hot, don't assume you simply need to tough it out. Identify cooling centers, public facilities, friends, relatives, hotels, or other safe locations with electricity before an emergency occurs. The same principle applies during extreme cold.
Pay particular attention to infants, older adults, people with certain medical conditions or disabilities, and anyone who may have difficulty regulating their body temperature.
Check on neighbors, friends, and relatives who may need additional help.
Generator Safety Can Save a Life
Portable generators can be extremely useful during extended outages, but they also create a potentially deadly carbon-monoxide hazard.
Never operate a portable generator inside a house, garage, basement, shed, or other enclosed or partially enclosed space.
Generators need to be operated outdoors and well away from doors, windows, and vents, following the manufacturer's safety instructions.
The same warning applies to charcoal grills, camp stoves, and other fuel-burning devices. Never use them indoors to cook or produce heat.
Every home should also have functioning carbon-monoxide alarms.
Don't Forget Your Animals
Your pets experience the outage too. Keep extra food and drinking water available for every animal in your household. Have medications, carriers, leashes, identification, and veterinary information ready if you suddenly need to leave.
Temperature is especially important. During extreme heat, provide plenty of cool water and move animals somewhere with safe temperatures if your home becomes too hot. During cold-weather outages, provide appropriate shelter and warmth.
If you have livestock or other outdoor animals, your plan may need to include backup water systems, ventilation, fencing, feeding, and alternative shelter.
Protect Your Home and Property
Power outages can create secondary problems around your home. If your property uses a sump pump, consider whether backup power is appropriate. In freezing conditions, think about protecting plumbing from frozen pipes. Battery-powered security lighting can also provide additional visibility around your property.
If you use a generator or portable power station, learn how to operate it before an emergency. An outage is not the ideal time to open the instruction manual for the first time.
AFTER: When the Electricity Comes Back
When power returns, give yourself a moment before returning everything to normal.
-Check your property for electrical problems, leaks, unusual smells, or other damage. Restore appliances gradually rather than switching everything on simultaneously.
-Check refrigerated and frozen food carefully and discard anything that is no longer safe.
-Then recharge your preparedness equipment. Recharge power banks, flashlights, radios, portable power stations, and other rechargeable devices. Replace used batteries, water, food, pet supplies, fuel, or other emergency items.
Finally, ask one very useful question:
What did we wish we had?
Maybe you needed another flashlight. Maybe your phone battery disappeared faster than expected. Maybe the kids struggled without a night-light. Maybe the dog became overheated. Maybe you realized your elderly neighbor needed assistance.
Those observations are valuable. Write them down and improve your plan.
Your Power-Outage Starter Checklist
You don't need to buy everything at once. Start with a few basics and build from there: flashlights and lanterns, spare batteries, charged power banks, drinking water, shelf-stable food, medications, first aid supplies, pet food and water, a radio, basic hygiene supplies, a refrigerator/freezer thermometer, emergency contact information, and a safe backup plan for heating or cooling.
Preparedness isn't about expecting disaster every time the weather changes. It's about creating options. When the lights go out, a prepared household already knows where the flashlights are, how they'll communicate, what they'll eat, how they'll protect their pets, and when it's time to leave for somewhere safer. That knowledge creates something incredibly valuable during an emergency: peace of mind.
Surviving Extreme Heat: A Complete Guide for People, Pets, and Property

Extreme heat is the deadliest weather event in the United States — it kills more people each year than hurricanes, floods, and tornadoes combined. And with heat waves arriving earlier and lasting longer, preparation isn't optional. It's survival.
Today we are talking about three main parts: protecting human life, protecting animals, and protecting your home and property.
Part 1: Protecting Human Life
Hydration is your first line of defense. Drink water before you feel thirsty — by the time thirst hits, you're already mildly dehydrated. Aim for 8–12 ounces every 15–20 minutes during outdoor activity. Avoid alcohol, caffeine, and sugary drinks, which dehydrate you. (these are my favorite electrolytes-not affiliated.
Time your activity. The hottest window is 10 a.m. to 4 p.m. Schedule outdoor work, exercise, and errands for early morning or evening. If you must be outside midday, take frequent breaks in shade or air conditioning.
Dress for the heat. Wear loose, light-colored, breathable fabrics. A wide-brimmed hat and sunglasses protect your head and eyes. Apply sunscreen — sunburn impairs your body's ability to cool itself.
Know the warning signs. Heat exhaustion looks like heavy sweating, weakness, dizziness, nausea, and cool clammy skin. Move to shade, drink water, and cool down. Heat stroke is a medical emergency: confusion, hot dry skin, rapid pulse, and no sweating. Call 911 immediately and cool the person with wet cloths or a cool bath.
The car rule: Never leave children, elderly adults, or anyone in a parked car. Interior temperatures can rise 20°F in just 10 minutes — even in the shade with windows cracked. Check the back seat every time you exit.
Part 2: Protecting Animals
Water and shade, always. Pets need constant access to fresh, cool water — refill bowls daily and keep them in shaded areas. In extreme heat, add ice cubes.
Walk smart. Hot pavement burns paw pads. Walk dogs on grass, and only in early morning or evening. A quick test: if the pavement is too hot for your bare hand, it's too hot for their paws.
Don't shave double-coated breeds. Dogs like huskies and golden retrievers have coats that insulate them against heat. Shaving can actually make them hotter and cause sunburn. Brush instead.
Never leave pets in cars. A car can reach deadly temperatures in minutes, even with windows cracked. Leave pets at home in air conditioning.
Watch for overheating. Signs include excessive panting, drooling, weakness, and collapse. Move the animal to shade, offer water, and wet their paws and ears. If they don't recover quickly, get veterinary help.
Part 3: Protecting Homes & Property
Keep cooling systems efficient. Service your AC before summer. Clean or replace filters monthly — a dirty filter makes the system work harder and use more energy. If you don't have AC, use fans strategically and create cross-ventilation.
Set smart temperatures. Around 78°F is the sweet spot for comfort and efficiency when you're home. When you're away, set it higher or use a programmable thermostat.
Block the sun. Close blinds, curtains, and shades on south- and west-facing windows during the day. This can cut heat gain significantly. Consider reflective window film for high-exposure windows.
Protect your landscaping. Water plants deeply in early morning — this reduces evaporation and helps roots absorb more. Mulch beds to retain moisture. Move potted plants to shaded areas.
Think long-term. Planting shade trees near south and west walls can lower your home's cooling costs for years. Native, drought-tolerant plants survive heat waves with less water.
Your Heat Preparedness Checklist
AC serviced and filters clean
Thermometer set to 78°F (or higher when away)
Blinds/curtains closed on sunny windows
Water bottles filled and ready
Pet water bowls filled and in shade
Sunscreen, hats, and light clothing accessible
Emergency kit: extra water, electrolytes, ice packs
Shade structures or umbrellas for outdoor areas
Plants watered and mulched
Family plan for heat emergencies (know the 911 signs)
Extreme heat is survivable — with the right plan. Prepare now, so when the mercury climbs, you're ready to protect everyone and everything you love.
Stay cool. Stay safe. Beat the heat.
Preparedness Begins With Peace
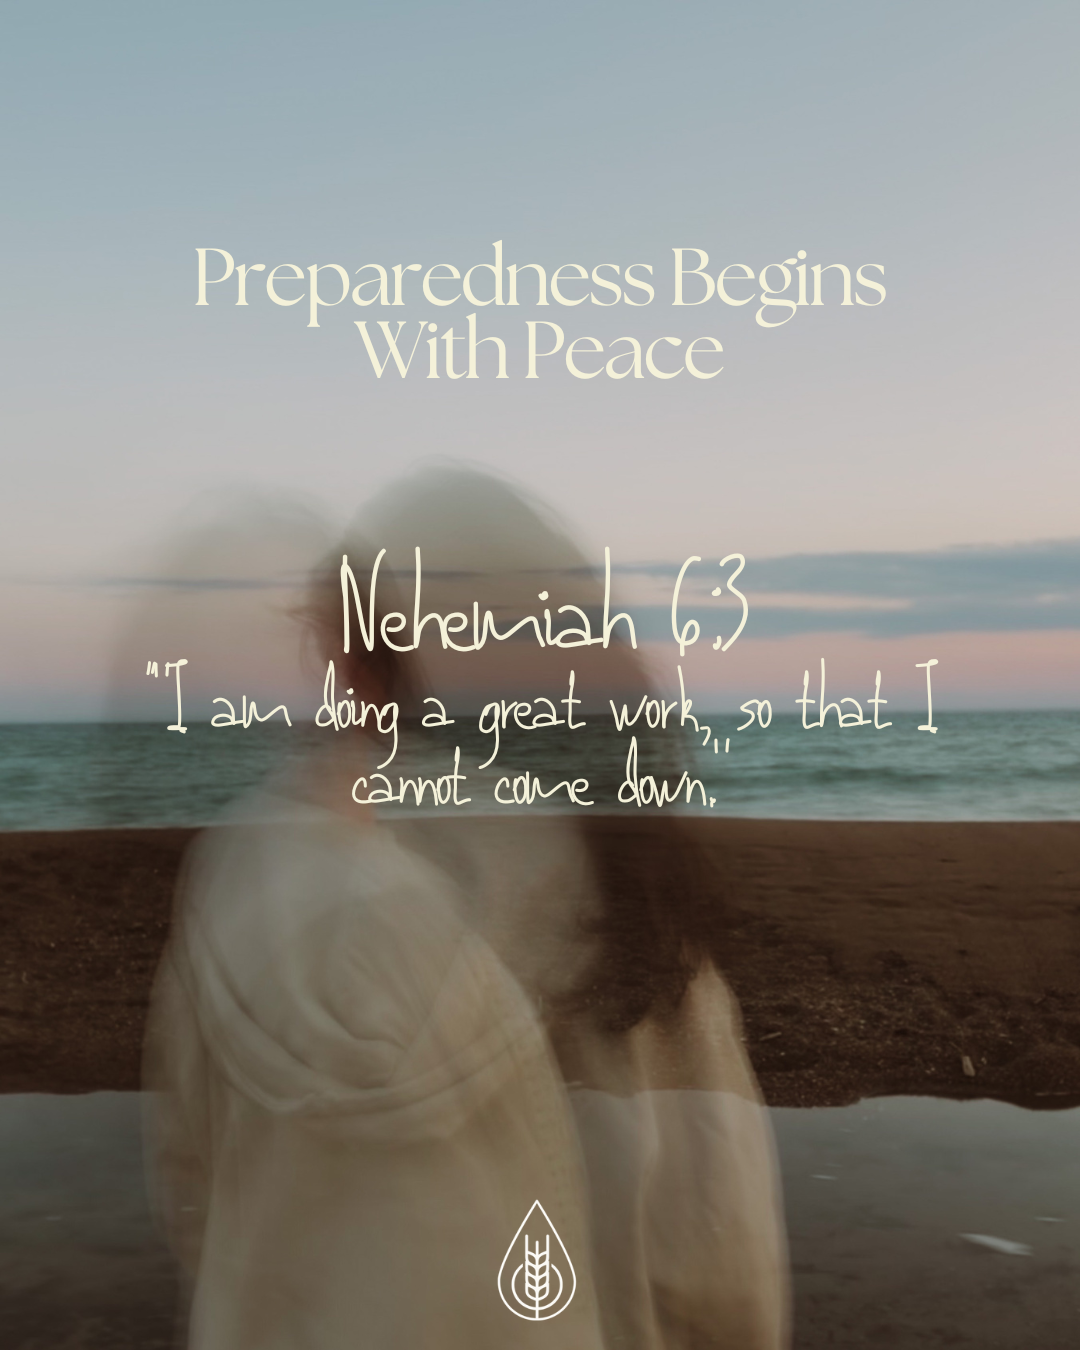
Spiritual Preparedness-Sunday Thoughts
Have you ever noticed how often the Bible talks about being prepared? I was doing some scripture study last night and decided to see just how often “prepared” was mentioned in the Bible. It was really neat to me to see just how many times it was. Which led me to my next thought-”I wonder how many times the word “peace” is mentioned. Here is what I found:
In the King James Version, these words appear throughout Scripture:
• Prepared — 101 times
• Prepare — 81 times
• Preparation — 9 times
But here's something even more remarkable...
The word peace appears 429 times. That is FOUR TIMES MORE!
I don't believe that's accidental. God never asks us to prepare because He wants us to live in fear. He invites us to prepare because He is a God of wisdom, stewardship, and peace.
Throughout the scriptures, God's people prepared:
• Noah prepared the ark before the flood.
• Joseph prepared Egypt for years of famine.
• Nehemiah rebuilt Jerusalem's walls while trusting the Lord.
• The wise virgins prepared their lamps before the bridegroom came.
Preparation has always been an act of faithful stewardship—not fear.
As we move through hurricane and wildfire season, it's easy to become overwhelmed by headlines, forecasts, and uncertainty. While we can't control the weather or every circumstance, we can choose how we respond:
-Prepare your home
-Prepare your emergency kit
-Review your family's evacuation plan
-And most importantly...Prepare your heart.
Jesus regularly withdrew to quiet places to pray and spend time with His Father (Luke 5:16). In the midst of busy crowds and difficult circumstances, He intentionally stepped away to be renewed. What a beautiful example for us. When it all feels to heavy we need to pause.
Today, take five quiet minutes.
-Take a slow, deep breath.
-Read Nehemiah 6:3:
"I am doing a great work, so that I cannot come down." Maybe turn this into a mantra and repeat it a few times.
-Pray. Pause. Listen.
-Reflect on one thing within your control today.
Diffuse a calming blend like Lavender, Frankincense, and Cedarwood as a gentle reminder to slow down and be present. I love these oils and use them often. I find their aromas helpful in creating a peaceful atmosphere for prayer and reflection.
Preparedness isn't only about what's on your shelves or making a 72hr kit. It's about cultivating a calm, steady heart.
When we prepare practically, emotionally, physically, and spiritually, we create space for peace—not because we've planned for every possibility, but because we've faithfully done what we can and placed the rest in God's hands.
"The Lord will give strength unto his people; the Lord will bless his people with peace." — Psalm 29:11
CLICK HERETO ORDER MY FAVORITE OIL KIT AND HERE FOR MY FAVORITE CALMING BLEND
Cheap Fixes That Could Stop an Ember From Getting Into Your House
Already worked through your yard zones? These fixes are the natural next step: protecting the house itself, not just the space around it.
You don't need a full home renovation to make your house harder to burn. That surprises people, because most of what gets talked about online — fire-resistant siding, new roofing, whole-home retrofits — sounds expensive and overwhelming. It can be. But some of the highest-impact fixes cost almost nothing and take an afternoon.
The idea behind all of them is the same: during a wildfire, it's usually not a wall of flame that takes a house down. It's a single ember finding a small gap and catching there, unnoticed, until it's too late. So the goal isn't to make your whole house fireproof — it's to close the specific small gaps embers use to get in.
Here are some of the cheapest, highest-value fixes.
Cover Your Vents
Every house has vents. Attic vents, crawlspace vents and foundation vents —most of them are just open mesh or slats built to let air through. That's exactly what lets embers through, too. A single ember landing in an attic vent can smolder inside your house for a long time before anyone notices anything's wrong.
The fix: cover vent openings with 1/8-inch metal mesh. It still lets air flow, but it's small enough to keep embers out. This is one of the cheapest fixes on this list and consistently one of the most effective. A small hardware store project, not a contractor job.
Clear Your Gutters
This one costs nothing but time. Dry leaves and pine needles sitting in a gutter are basically kindling waiting on a roof. Combine that with an ember landing in it, and you've got a fire starting somewhere you can't easily see or reach.
Clear gutters aren't just a spring-cleaning chore — during fire season, they're part of your home's defense. If you're in a high-risk area, it's worth checking them more than once a season.
Swap the Mulch Near Your House
Wood mulch is common right up against foundations and walkways, and it's exactly the kind of material that catches fast and burns close to the house. Swapping it for gravel, rock, or pavers in the area closest to your walls removes that fuel entirely.
This one matters most in the first few feet around your house, the same zone that does the most work in stopping embers before they reach anything flammable.
Why Small Fixes Add Up
None of these things alone will save a house on their own. Together, they close off the most common ways embers actually get in: through vents, through debris, through material sitting right against the walls. That's the whole point of home hardening: not one big expensive change, but a handful of small ones that remove the easy opportunities a fire looks for.
These can be done in a weekend-so stop putting it off and get out there!
Most Homes Don't Burn From the Fire Itself — Here's What Actually Gets Them
If you've done any wildfire prep at all, you've probably heard "clear your yard" more times than you can count. It's true, but it's also vague enough to be nearly useless. Clear what, exactly? How far out? Does it matter where I start?
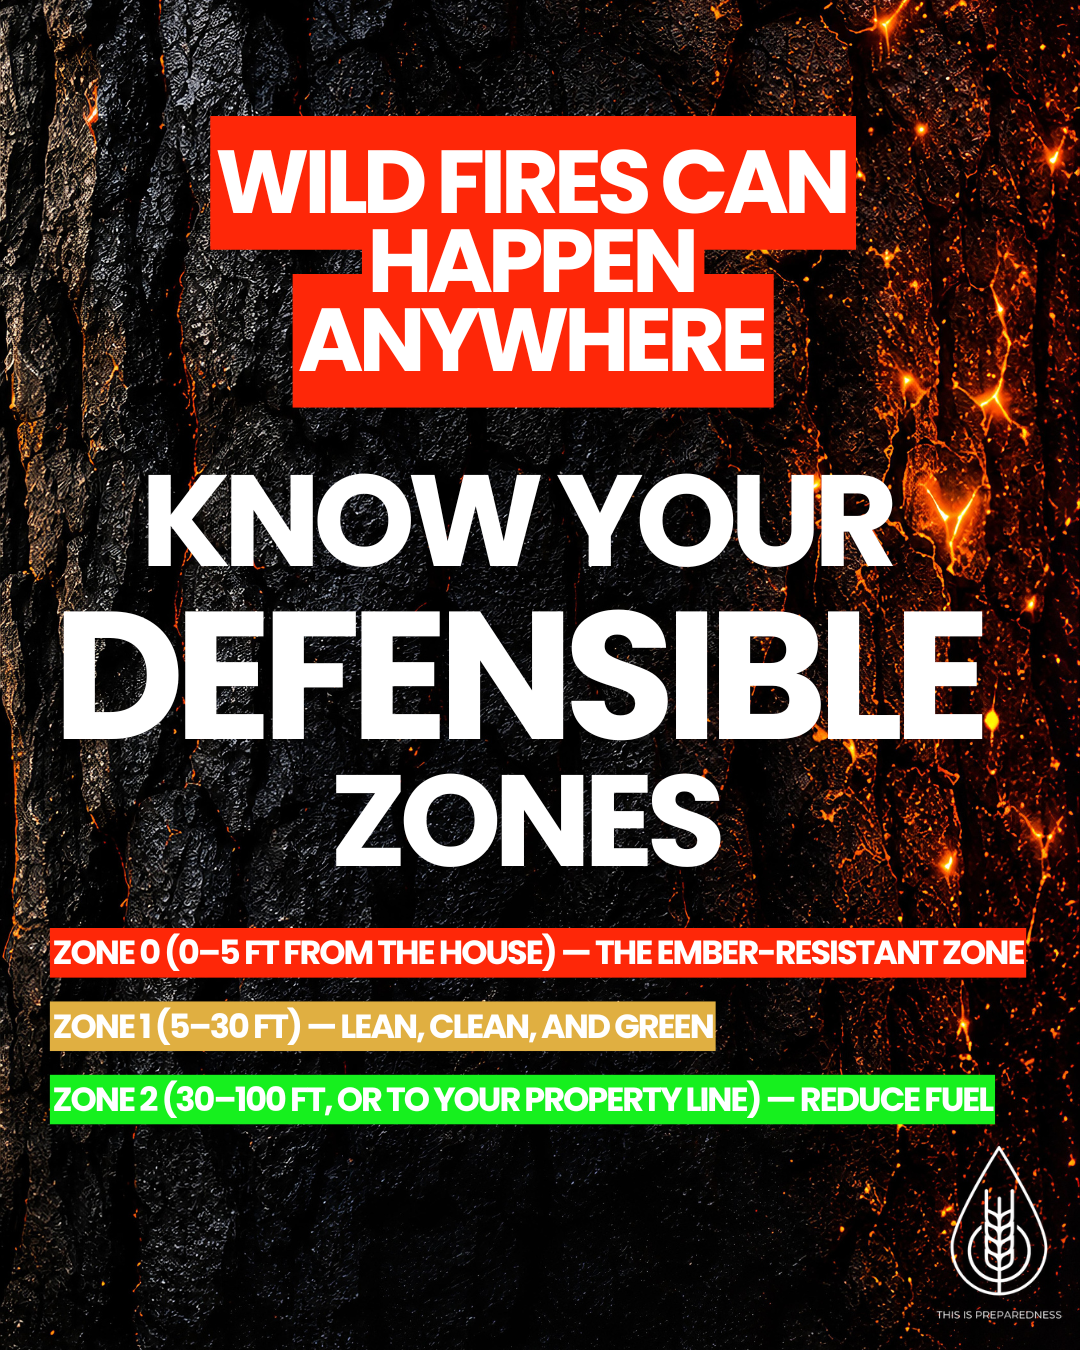
It does. Defensible space isn't one big cleared yard. It's three distinct zones around your home, each doing a different job. And the zone that matters most is usually the one people skip entirely.
Zone 0: The First 5 Feet
This is the ember-resistant zone, and it's the one wildfire science points to as the single biggest factor in whether a home survives a fire. Not the flame front. Not the wall of fire you picture when you think "wildfire." Embers.
During a wildfire, embers can travel over a mile ahead of the fire itself, landing on roofs, in gutters, under decks, and right up against exterior walls — often long before any visible flame arrives. If there's something flammable sitting in that first 5 feet, an ember doesn't need a wall of fire to start a house burning. It just needs one dry, forgotten spot.
That means:
No mulch, plants, or shrubs within 5 feet of any wall — gravel, pavers, or bare soil instead
Gutters, roof, and deck clear of dead leaves and needles
Nothing combustible stored under decks or against the house
Wood fencing that touches the house replaced or broken up with a non-combustible section
This zone is small, which is exactly why it's easy to underestimate. It's also why it's increasingly required by law — California's AB 3074 mandates it in high fire hazard areas, and more jurisdictions are following. Check with your local fire department on what's actually required where you live, because this is changing fast.
Zone 1: 5 to 30 Feet — Lean, Clean, and Green
This is the zone most people already think of as "yard clearing." Grass mowed short, dead vegetation gone, space between shrubs and trees so fire can't hop from one to the next.
The detail people miss here is vertical spacing, not just horizontal. If a low branch sits close to the grass beneath it, or a shrub grows right up against the base of a tree, you've built a ladder — literally. Fire climbs it. Clearing branches up to 6 feet off the ground and removing vegetation growing under larger trees breaks that ladder before it forms.
Zone 2: 30 to 100 Feet — Reduce Fuel
By the time fire reaches this zone (or your property line, whichever comes first), the goal isn't elimination — it's reduction. Thin the trees so canopies aren't touching. Keep grass mowed. Clear dead fuel. You're not trying to make this area bare; you're trying to make sure fire arrives at your house zone with less intensity than it started with.
Why the Order Matters
Most people do this backwards. They tackle the big, visible outer areas first — the overgrown back fence line, the brush pile at the edge of the property — because it feels like the biggest job. Meanwhile the 5 feet closest to the house, the zone that actually determines whether an ember catches, goes untouched.
Start at the house. Work outward. If you only have one weekend this month, spend it on Zone 0.
This Isn't Just a California Thing Anymore
A lot of the language around defensible space — Zone 0, Zone 1, Zone 2 — comes out of California wildfire policy, and if you're outside California it might be tempting to treat this as someone else's problem. Given how dry and fire-prone much of the country is right now, that's a mistake. Many states in the western US are experiencing many wildfires as well as the southeast. No one is immune, they can happen literally anywhere. The physics of embers and ignition don't care about state lines. Treat this as the model fire agencies use everywhere, and check your own local requirements on top of it.
The Original Preppers: What America's Founders Knew About Self-Reliance

As America approaches its 250th birthday this summer, I have been thinking a lot about where the spirit of preparedness comes from and how deeply it is woven into the history of this country.
The founders of this nation were, by necessity and by conviction, some of the most prepared people who ever lived. Not because they loved emergency kits. But because the world they lived in demanded self-reliance as a baseline condition of survival.
WHAT SELF-RELIANCE LOOKED LIKE IN EARLY AMERICA
Storing food in Colonial America was a daily necessity rather than a choice. Because there were no grocery stores or refrigerators, households had to preserve, cure, and can their seasonal harvests and butchered meats to ensure they had enough sustenance to survive the harsh winters. Root cellars were stocked each fall with enough preserved food to survive a winter without resupply. Salt, smoke, and fermentation kept meat and vegetables viable for months. Water was collected, stored, and conserved. Every household maintained the tools and skills needed to produce what they could not buy which, in many cases, was most things.
In doing some research, I learned that when Thomas Jefferson wrote about the virtues of an “agrarian, self-sufficient citizenry”, he was not writing abstractly. He was describing what he believed made free people free — the practical ability to sustain themselves without dependence on systems or institutions that could fail or be controlled by others.
Benjamin Franklin's ‘Poor Richard's Almanack’ was, among other things, a preparedness manual. "By failing to prepare, you are preparing to fail" is not a quote about business strategy. It is a statement about how free people take responsibility for their own lives.
The past 20+ years I have been learning and practicing self-reliance in as many areas as I can. It is something that gives me peace-knowing I can provide for my family in the lean times or seasons of natural disasters. It is freeing. It is something I am very proud of.
COMMUNITY PREPAREDNESS AS AN AMERICAN VALUE
The founding era also understood something that modern preparedness culture sometimes misses: individual preparation and community resilience are not competing values — they reinforce each other.
Have you ever seen videos of the Amish and their barn raisings? It is a work of beauty in so many ways but I especially love the many helping hands coming together to help and then the speed and quality in which the barns are built. They come TOGETHER. They build their community TOGETHER.
Barn raisings. Food drives. Food swaps. The tradition of neighbors helping neighbors through hard seasons. Ahhhh….these were not charity cases. They were systems of mutual preparedness — everyone contributing to a collective capacity that benefited everyone. To me, that’s what the true American spirit is all about. We NEED to get back to our roots, the fundamentals.
A prepared neighborhood is exponentially more resilient than a collection of prepared households with no connection to each other. We need to get to know our neighbors. Find out what they need or how we can help them be a little better prepared.
WHAT THIS MEANS FOR US 250 YEARS LATER
The infrastructure of modern life is remarkable. It is also more fragile than we tend to acknowledge. Power grids, supply chains, water systems, communication networks — all of it can be disrupted by weather, by natural disaster, by human error, or by any number of events that history tells us are not as rare as we hope.
The founding generation did not see self-reliance as pessimism. They saw it as FREEDOM. The ability to sustain your family without depending entirely on systems outside your control is not a doomsday mentality. It is an expression of the same spirit that has always made this country resilient.
Two hundred and fifty years later, the tools look different but the principle is the same. Store what you need, build your skills, know your neighbors and prepare with the same quiet confidence that built this country.
Happy almost-250th!
You Did the Work. Now You Are Ready.
Ten weeks ago, you made a decision. Maybe it was a wildfire alert that nudged you. Maybe it was a news story that hit a little too close to home. Maybe it was simply the quiet, persistent feeling that you should be doing more to protect the people you love.
Whatever brought you here — you showed up. And week after week, you kept showing up. You built something real. Not a vague intention, not a half-finished list on your phone. An actual kit. An actual binder. An actual plan.
That is worth celebrating! And it is worth understanding exactly what you have accomplished.
What We Built Together
Here is a look at every week of the challenge and what it added to your family's preparedness:
Week 1 — Starting Your Kit + Your Binder (the foundation) — choosing your contianer, understanding the goal, and beginning your Grab & Go Binder with the documents that matter most.
Week 2 — Water Storage + Purification (the non-negotiable). How much to store, how to store it safely, and how to purify water when your supply runs out.
Week 3 — Food + Nutrition. Shelf-stable meals your family will actually eat, how to rotate your supply, and the "eat what you store" principle that makes prep sustainable.
Week 4 — Shelter + Warmth. Staying safe when your home is compromised or you need to leave — emergency blankets, clothing layers, and shelter essentials.
Week 5 — First Aid + Medical Supplies. A comprehensive first aid kit, the three emergencies most likely to matter, and why CPR certification is the highest-impact skill you can learn.
Week 6 — Lighting, Communication + Organization. Reliable lighting, backup communication when cell networks fail, and getting your kit organized so it actually works under pressure.
Week 7 — Tools, Gear + Sanitation. The practical tools that keep you self-reliant, and the sanitation supplies that protect your family's health when plumbing stops working.
Week 8 — Holistic Preparedness. Personal comfort items, identification documents, and written emergency protocols — because true preparedness takes care of the whole person.
Week 9 — Special Needs + Community. Making sure your plan accounts for every member of your household — and how a prepared neighborhood is safer for everyone.
Week 10 — Review, Refresh + Maintain. How to keep your kit current, when to rotate supplies, and how to make preparedness a sustainable habit rather than a one-time project.
Preparedness Does Not Stop Here
Completing this challenge is a genuine achievement — but it is also a beginning. A 72-hour kit is exactly what it sounds like: enough to sustain your family for 72 hours. Many emergency situations last longer. And preparedness, like any skill, needs to be maintained and deepened over time.
Think of your kit not as a finished project but as a living system. It needs to be checked, updated, and refreshed — just like your smoke detector batteries or your car's oil.
Here are the most important things to do to keep your preparedness strong:
Review your kit every six months. Check expiration dates on food, water, and medications. Replace anything that has been used or expired. A kit that has not been checked is a kit you cannot fully trust.
Update your binder when life changes. New medications, new insurance, a new address, a new family member or pet — your binder should always reflect your family's current reality.
Re-certify in CPR annually. The physical skill fades faster than you expect. A refresher course takes just a few hours and could make all the difference.
Expand toward a two-week supply. Once your 72-hour kit is solid, start building toward 14 days of food, water, and supplies. Extended emergencies are more common than most people think.
Connect with your community. A prepared neighborhood is exponentially safer than a prepared household alone. Share what you have learned. Encourage the people around you to build their own kits.
If you are still working through the weeks, it;s ok-keep going. There is no deadline on this. Every week you complete adds something real to your family's safety.
And if you have finished all ten weeks — take a breath! Look at what you built. Then SHARE this info with someone who needs to start.
Thank you for being here! For taking this seriously. For choosing to be the person in your family who made sure everyone was ready. That is one of the most loving things you can do.
Look How Far You Have Come
Can we just take a moment to acknowledge something? You showed up. Week after week, you kept going — even when life was busy, even when it felt like a lot, even when you were not sure you were doing it right. That matters more than you know.
We are now nearing the end of the 10-Week Challenge, and the work you have done over the last four weeks has been some of the most important of the entire series. Not the flashiest, maybe, but the kind of preparation that really makes a difference when something goes wrong.
Here is a look at everything we have covered and why each piece of it matters:
Week Five: First Aid & Medical Supplies
Emergencies do not wait for help to arrive. The window between when something goes wrong and when a paramedic walks through the door is often 3 to 5 minutes — and what happens in that window is almost entirely up to the people already in the room.
This week we made sure our families have essential medical supplies ready to go: a well-stocked first aid kit, wound care essentials, burn treatment supplies, medications, and the tools needed to act quickly and effectively. We also talked about the single highest-impact skill you can learn — CPR and basic first aid certification — and where to get trained for free or low cost through the American Red Cross and local fire stations.
Binder focus this week: Medical records, prescriptions, allergy information, and insurance cards — all in one section, easy to find under pressure.
Week Six: Lighting, Communication & Organization
Having supplies is one thing but being able to actually use them — in the dark, without cell service, while your adrenaline is pumping — is another thing entirely.
That is what Week 6 was about. We focused on reliable lighting (hand-crank flashlights, headlamps, extra batteries), backup communication methods for when cell networks go down, and getting everything organized so that your kit is functional.
Binder assignment: Create a digital backup of your most important documents. Scan or photograph everything and save it to a secure cloud account — Google Drive, iCloud, or Dropbox. Then move to a thumb drive and give a copy to one trusted family member outside your household.
Week Seven: Tools, Gear & Sanitation
This is not about doomsday prepping. This is recognizing that power outages, floods, evacuations, and emergencies can happen to any of us — often with very little warning, and often while we are safely at home. Week 7 was about the practical tools and gear that keep you self-reliant when the normal systems we depend on every day stop working.
Binder focus: Family and Pet Information Pages — one page per person, one per pet. Full name, photo, medical information, medications, and anything a first responder or shelter worker would need to know. Takes 20 minutes but so worth it!
Week Eight: Holistic Preparedness
True preparedness does not just take care of the body. It takes care of the whole person — body, mind, heart, and spirit. Week 8 was a reminder that survival is not just physical. The comfort items, the familiar things, the small pieces of normal that you bring into a difficult situation — they matter more than most preparedness guides acknowledge.
We focused on personal and comfort items, identification documents, and something else most people again skip entirely: written emergency instructions and protocols. When stress is high and adrenaline takes over, even prepared people can freeze. Having a simple, clear, written plan means your family knows exactly what to do without having to think through it in the moment. No guessing. No panicking. Just action.
Binder focus: Important Instructions and Emergency Protocols — your step-by-step guide for the scenarios most likely to affect your family. Written clearly and laminated if possible. Keep it where everyone can find it.
If you are behind, keep going! Some progress is better than no progress. Every single step you take today puts your family in a better position tomorrow- and that is worth everything.
We have two weeks left in the challenge, and they are good ones. If you have been following along from the beginning, you are almost there! If you are just finding this now, start wherever you are — every week stands on its own and every piece you add makes a difference.
Thank you for being here and for taking this seriously. Showing up for the people you love in this way is the so important and rewarding.
The Highest-Impact Skills You Can Learn: First Aid and CPR
If you could do one thing this month to genuinely increase your family's safety — not in a theoretical, someday kind of way, but right now, in real life — it would be this: get certified in First Aid and CPR.
Not because emergencies are inevitable and not because you need to live in fear. But because the window between when something goes wrong and when help arrives is often 3 to 5 minutes — and what happens in that window matters more than almost anything else.
Cardiac arrest. Severe bleeding. Choking. These are not rare events that happen to other people. They happen at home, at the dinner table, in the backyard. They happen to children and grandparents and healthy adults without warning. In that critical window, the person who can help is almost always not a paramedic. It is someone like you.
WHY FIRST AID AND CPR MATTERS
Every minute that passes after cardiac arrest without intervention reduces survival rates by 7 to 10 percent. Bystander CPR can double or triple the chances of survival, yet fewer than half of Americans know how to perform it correctly.
Basic first aid knowledge: how to stop severe bleeding, how to treat a burn, how to help someone who is choking those cover the majority of emergency situations an average person will ever encounter. We are not training for wilderness survival. We are getting the training and skills that should be everyday knowledge in every home.
HOW TO GET CERTIFIED
Getting certified is far easier than most people think. The American Red Cross offers both in-person and online courses for First Aid, CPR, and AED use. Many courses can be completed in a single day, and prices range from free to around $30 to $80 depending on location and course level. (Visit redcross.org to find a class near you.) Take your spouse or partner and make it a double date!
The American Heart Association is another trusted source, particularly for hands-only CPR training and more advanced certifications. (Visit heart.org for course listings.)
Many local fire stations offer free community CPR training — call your nearest station and ask. This is an underused resource that most people do not know exists.
It is important to re-certify annually. CPR guidelines are updated periodically by the American Heart Association, and the physical skills — especially chest compressions and rescue breathing — fade much faster than you would expect without regular practice.
BUILDING YOUR FIRST AID KIT
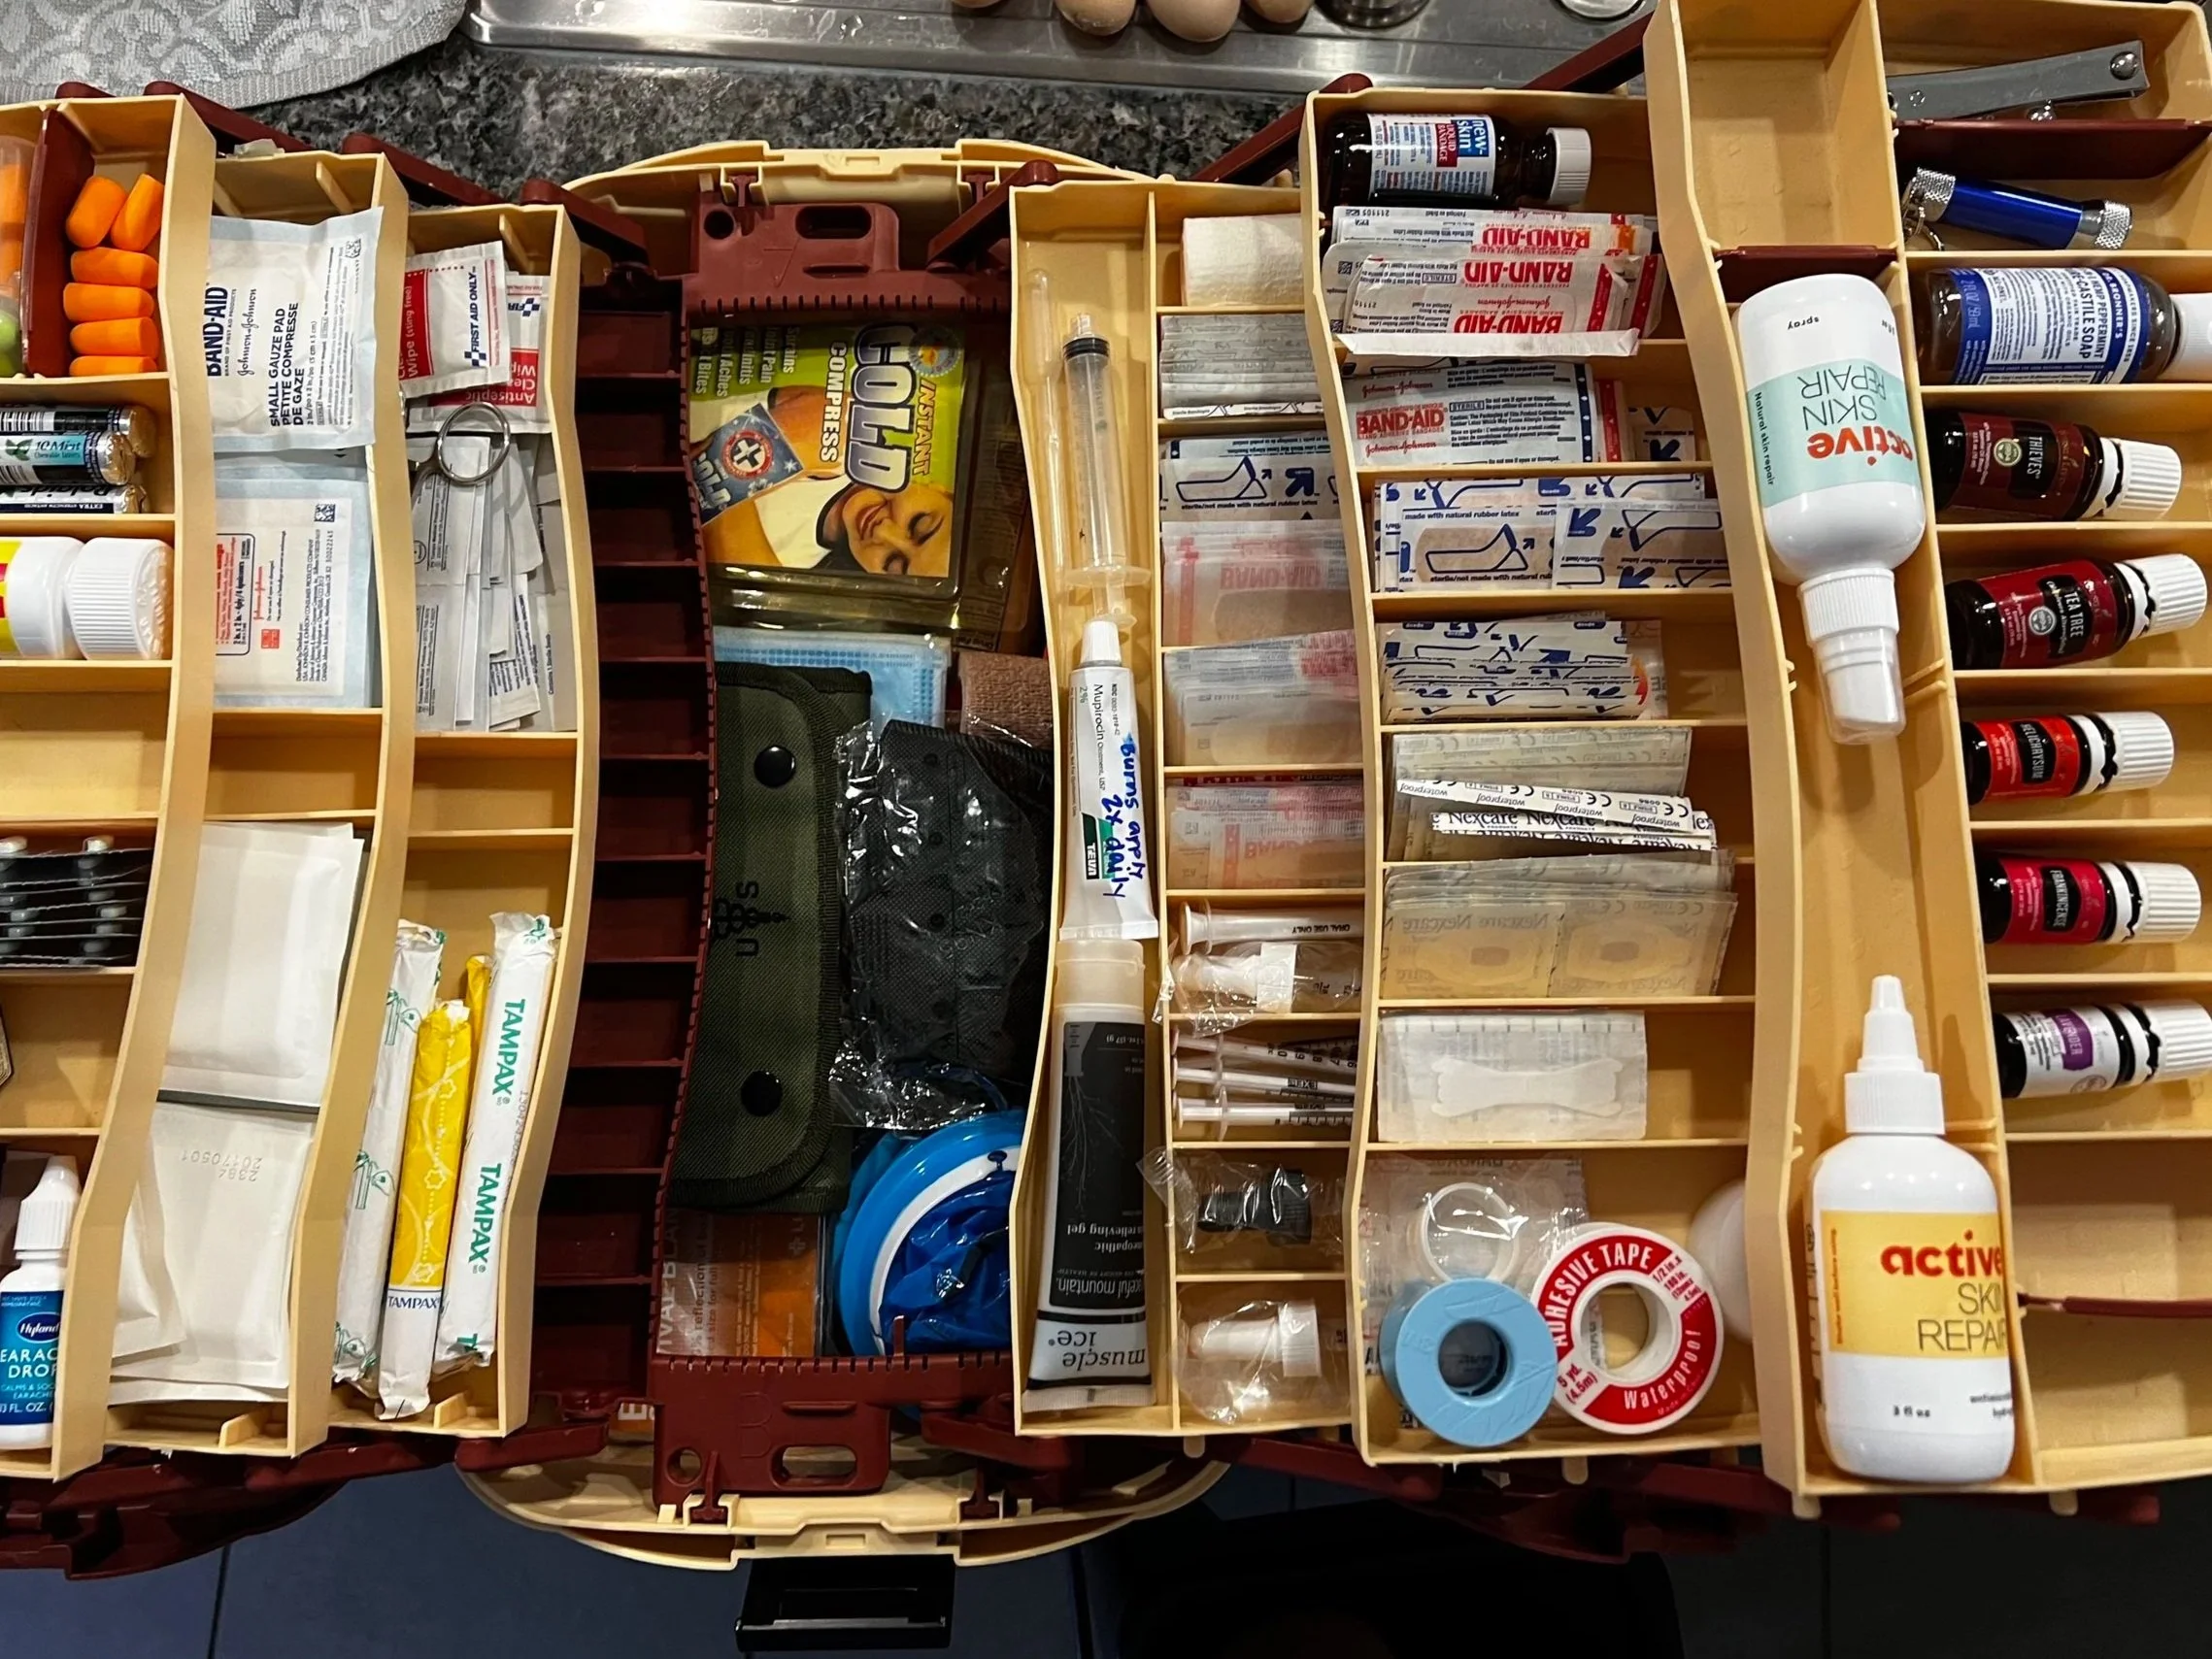
Knowledge matters. So do supplies. A well-stocked first aid kit at home and in your car means you can act immediately without scrambling. Check your kit every six months. Supplies expire, and at least in my home items get used without being replaced.
I have created a comprehensive list of what your home first aid kit should include: (CLICK HERE for FREE printable)
RESOURCES TO LEARN MORE
American Red Cross — redcross.org/take-a-class
American Heart Association — heart.org/cpr
FEMA Emergency Preparedness — ready.gov
Poison Control Center — 1-800-222-1222 (available 24/7)
Stop the Bleed Campaign — stopthebleed.org (free bleeding control training)
American College of Emergency Physicians First Aid guide — available at acep.org
This is your reminder that preparedness is not about fear at all. It is about love — for your family, your neighbors, your community. A few hours of training and a well-stocked kit could be the difference between a tragedy and a story you tell about the day everything was okay because someone knew what to do.
That someone can be you.
Preparing Your Mind Is Part of the Plan
We talk a lot about kits and checklists- but what about the fear, the anxiety, and the stress that come with facing the unknown? Emotional preparedness is just as real, and just as important.
When we think about emergency preparedness, most of us jump straight to the practical or common areas: water, food, first-aid kits, documents. And yes — all of that matters. But, there is a piece of preparedness that often gets left out of the conversation entirely, and it might be the most important piece of all.
Here are some questions to ask yourself: How will you think clearly under pressure? How will you calm your children when they are scared? How will you keep going when the situation feels overwhelming? These are not small questions and do require some inner reflection and analysis. But the good news is you can prepare for them, just like you prepare for anything else.
The Emotional Side of Emergencies
Fear is a natural response to uncertainty. When disaster strikes, your nervous system goes into survival mode — heart racing, thoughts spinning, instincts taking over. That is not a character flaw, it’s biology. But when we have taken the steps to do the emotional work ahead of time, we give ourselves a fighting chance to respond rather than react.
Emotional preparedness means thinking through the hard questions before you are in the middle of a crisis. It means having conversations with your family now, so no one is hearing the plan for the first time when sirens are going off. It means building the mental and emotional muscle that makes clear thinking possible under pressure.
This is not about eliminating fear, it’s about building enough steadiness that fear does not make the decisions for you.
How to Emotionally Prepare
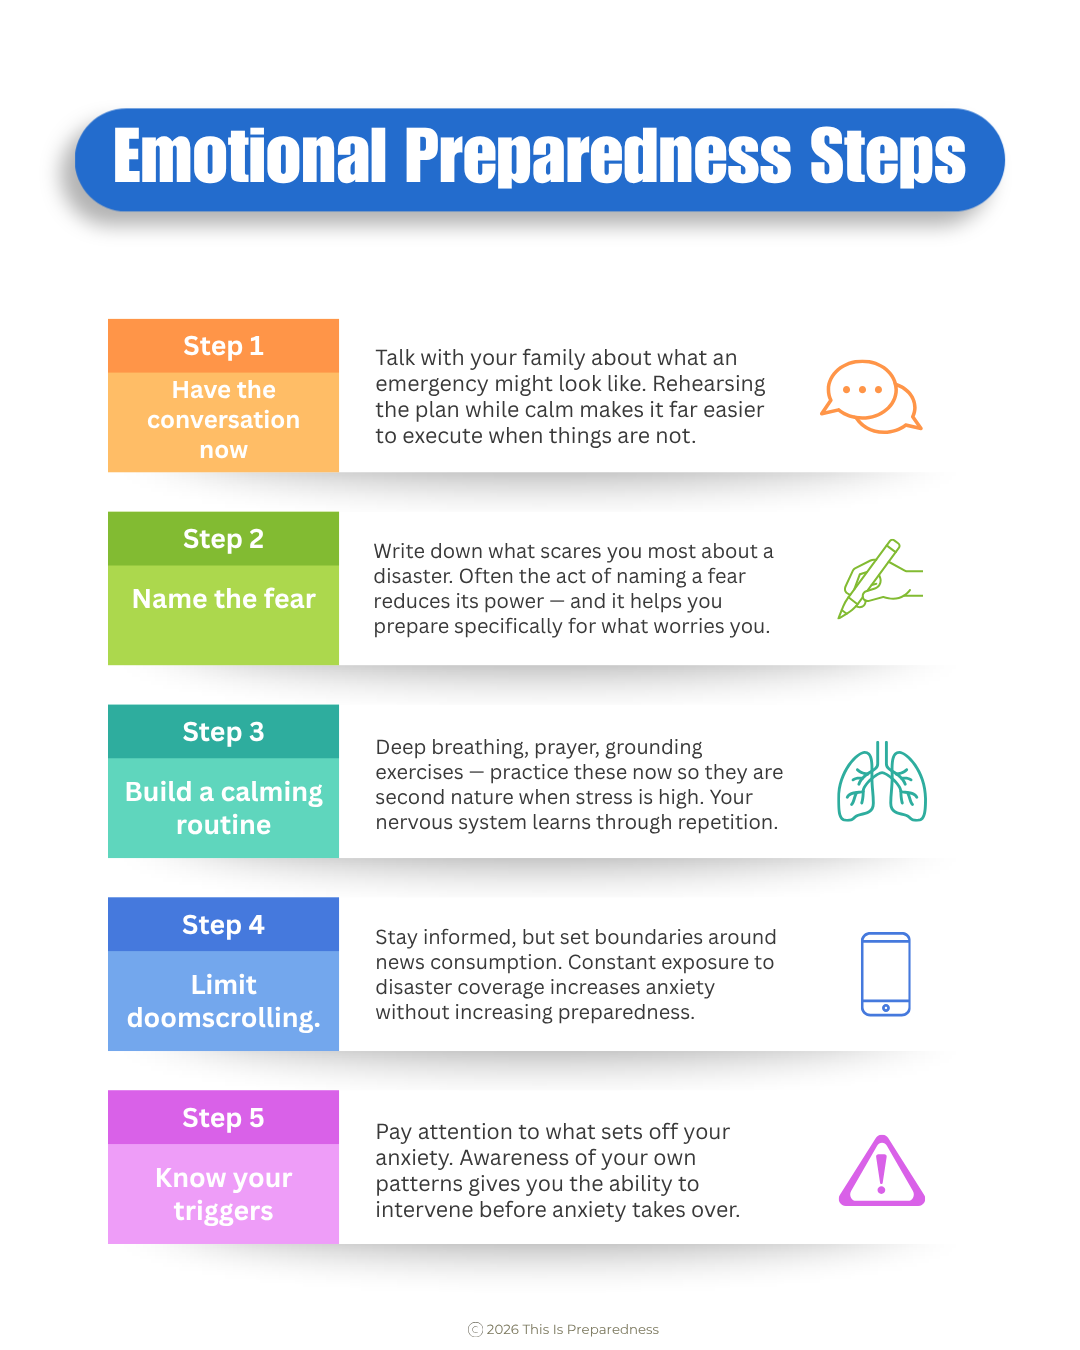
Step 1 — Have the conversation now. Talk with your family about what an emergency might look like. Rehearsing the plan while calm makes it far easier to execute when things are not. Do the fire drills, drive your evacuation route, establish your meeting location, etc.
Step 2 — Name the fears. Write down what scares you most about a disaster. Often the act of naming a fear reduces its power — and it helps you prepare specifically for what worries you. Use the scripture above as a type of mantra. Name the fear, read the verse. Do this over and over. In an emergency situation it can help calm your mind and emotional state.
Step 3 — Build a calming routine. Deep breathing, prayer, grounding exercises — practice these now so they are second nature when stress is high. Your nervous system learns through repetition.
Step 4 — Limit doomscrolling. Stay informed, but set boundaries around news consumption. Constant exposure to disaster coverage increases anxiety without increasing preparedness.
Step 5 — Know your triggers. Pay attention to what sets off your anxiety. Awareness of your own patterns gives you the ability to intervene before anxiety takes over.
Step 6 — Practice acting anyway. Courage is not the absence of fear — it is taking the next right step despite it. Build the habit of doing what needs to be done even when you are uncomfortable.
Talking to Your Kids
Children take their emotional cues from the adults around them. If you are panicked, they will be panicked. If you are calm and confident — even while being honest — they will feel safer. The goal is not to shield them from reality, but to give them age-appropriate information alongside the reassurance that your family has a plan.
For younger children: Keep it simple and concrete. "If something scary happens, here is exactly what we will do." Practice a fire drill. Show them where you keeo your 72 hr kit and supplies. Let them help pack it, participation helps build their confidence.
For older children and teens: Include them in the planning process. Ask for their input. Give them a real role in the family's emergency plan. Responsibility is empowering, and empowered kids are calmer kids.
Tools to Support Your Emotional Readiness
You do not have to figure this out alone! I have compiled a list here of some excellent free and low-cost resources designed to help individuals and families build emotional resilience. Discuss these resources with your friends and family. Print these out and post somewhere where every one can see it.
SAMHSA Disaster Distress Helpline — Free, confidential crisis counseling for people experiencing emotional distress related to disasters. Call or text 1-800-985-5990. Available 24/7.
Ready.gov — Coping with Disaster — The official FEMA resource on managing stress and emotional health before, during, and after emergencies. Includes guides for families and children.
American Red Cross Mental Health Resources — Free mental health support through Red Cross disaster response teams, plus online guides for building emotional resilience at every age.
"The Disaster Preparedness Handbook" by Arthur T. Bradley — A practical guide that addresses both the physical and psychological dimensions of preparedness. This is widely recommended, especially for families.
Calm & Headspace apps — I really like these apps. Both offer guided breathing, meditation, and stress management tools. Building a daily practice now means these skills are available to you when you need them most. They both offer a free 7 day trial.
Finding Peace in Purpose
For those whose preparedness is rooted in faith, emotional readiness takes on a deeper dimension. Preparing your family is an act of love and stewardship. It is not an expression of fear — it is an expression of care. Many people find that the very act of preparing brings a profound sense of peace, because it aligns action with values.
One of my favorite bible scriptures is John 14:27:
“Peace I leave with you, my peace I give unto you: not as the world giveth, give I unto you. Let not your heart be troubled, neither let it be afraid.”
You cannot control everything that happens around you. But you can control whether your family is ready.
Whatever your background or belief system, the emotional foundation of preparedness is the same: you are not preparing because you are afraid. You are preparing because you love the people in your life, and love takes action.
Are You Ready for Whatever Comes Next? The Case for Skill-Based Learning and Emergency Preparedness

Most people think about emergency preparedness the same way they think about going to the dentist — they know they should do it, they plan to get around to it eventually, and then life gets in the way. But here's the thing: skills aren't just for emergencies, they're for life. And the gap between people who have them and people who don't becomes painfully obvious the moment something goes wrong.
This post is about closing that gap.
Why Skill-Based Learning Matters
We live in a world of instant information. Any question you have can be answered in seconds with a quick search. And that's genuinely great — except when the power is out, your phone is dead, you're under stress, or seconds matter. In those moments, what you know beats what you can look up every time.
Skill-based learning is different from passive knowledge. It's not enough to have read about CPR or to vaguely remember a fire safety video from a workplace training years ago. Real preparedness means practicing skills until they become muscle memory — so that when the moment comes, your body knows what to do before your brain has finished processing the situation.
Consider this: 70% of Americans live in areas prone to natural disasters. The average fire department response time is around three minutes. A lot can happen in three minutes. The people who fare best in emergencies aren't the ones who panicked less — they're the ones who had practiced more.
The Core Skills Everyone Should Know
1. First Aid and CPR
This is the single highest-impact skill the average person can learn. Cardiac arrest, severe bleeding, choking — these events happen without warning, often in the home, often to people you love. The first 3 to 5 minutes are critical, and emergency services are rarely there in time to act during that window. You are.
Getting certified in CPR and basic first aid is easier than most people think. The American Red Cross and many local fire stations offer courses that are free or low cost. The investment is a few hours of your time, and the return is the ability to genuinely save a life.
A few things to keep in mind:
Keep a well-stocked first aid kit at home and in your car. Check it every six months — supplies expire and get used without being replaced.
Focus on the three most common emergencies: severe bleeding, burns, and choking. These cover the majority of situations you're likely to encounter.
Re-certify annually. CPR guidelines are updated periodically, and the physical skill fades faster than you'd expect if you're not practicing.
2. Fire Safety
Fire moves faster than most people imagine. In a modern home filled with synthetic materials, a fire can go from a small flame to a fully engulfed room in under two minutes. That's not meant to be alarming — it's meant to be motivating.
Know your home's exit points. Not just the front door, but every window, every route out of every room. Practice it with your family, including children. Know where your fire extinguisher is and, more importantly, know how to use it. The acronym PASS covers it: Pull the pin, Aim at the base of the fire, Squeeze the handle, Sweep side to side. It takes about ten seconds to learn and could save your home.
Review your fire safety plan every year. It's not a one-time conversation — families change, homes change, and habits drift.
3. Navigation and Communication
Here's a skill that has quietly eroded over the past two decades: the ability to navigate without a phone. GPS has made this feel unnecessary right up until the moment it becomes essential — a dead battery, a downed cell tower, a remote area with no signal.
Learn to read a paper map
Keep one in your car
Know the basic geography of your area well enough to get home or to a safe location without turn-by-turn directions.
And know your most important phone numbers by heart. Not saved in your contacts — actually memorized. If you ever need to borrow someone's phone in an emergency, you'll be glad you did.
4. Basic Home Repairs and Utility Management
When something goes wrong in a home — a burst pipe, a gas leak, a tripped breaker — the ability to respond quickly and correctly can prevent a minor problem from becoming a major one.
Know where your main water shutoff valve is and how to operate it.
Know where your electrical panel is and how to safely reset a breaker.
Know the signs of a gas leak and what to do if you suspect one.
These aren't advanced skills. Most of them can be learned in an afternoon with a YouTube video and a walk through your own home. But they require actually doing that walk-through, not just knowing it's something you should do.
5. Go Bag Readiness
A 72 hr kit or "Go Bag" is a pre-packed bag containing everything you'd need to leave your home quickly and sustain yourself for 72 hours. The goal is to be able to grab it and go in under two minutes — which means it needs to be packed in advance, kept somewhere accessible, and checked regularly.
A basic 72 hr kit includes water and water purification tablets, non-perishable food, a flashlight and extra batteries, a first aid kit, copies of important documents, cash in small bills, a phone charger and backup battery, a change of clothes, and any medications you take regularly. Tailor it to your household — if you have children, elderly family members, or pets, account for their needs too.
Check your 72 hr kit every six months. Rotate out food and water, replace expired medications, and make sure everything still fits your family's current needs.
Join our 10 week 72 hr Kit Challenge-HERE! Start today!
Building the Habit
The hardest part of preparedness isn't learning the skills — it's maintaining them. Here's a simple framework:
Every month: Practice one skill. Run through your home exit plan. Check your first aid kit. Review your emergency contacts.
Every six months: Rotate your Go Bag supplies. Review and update your emergency plan with your household. Refresh your CPR knowledge.
Every year: Recertify in first aid and CPR. Do a full home safety walkthrough. Update your documents and emergency contacts.
It doesn't have to be overwhelming. Think of it less like a checklist and more like a habit — the same way you maintain your car or your health, you maintain your preparedness.
The Bigger Picture
Skill-based learning is ultimately about agency. When you have these skills, you are not waiting to be rescued — you are the person who can help. You can treat the wound, navigate the route, calm the room, make the call, get the family out. That shift from passive bystander to capable responder is one of the most meaningful things you can invest in.
An ounce of prevention is worth a pound of cure — but only if you've actually practiced it.
What skill are you going to commit to learning or refreshing this month? Start there. One skill at a time is how you build the kind of preparedness that actually holds up when it matters.
Share this post with someone who'd benefit from a reminder. And drop a comment below — what's one skill you've been meaning to learn?
What Red Flag Warnings Really Mean (And Why You Should Be Paying Attention)
This isn’t just another weather alert.
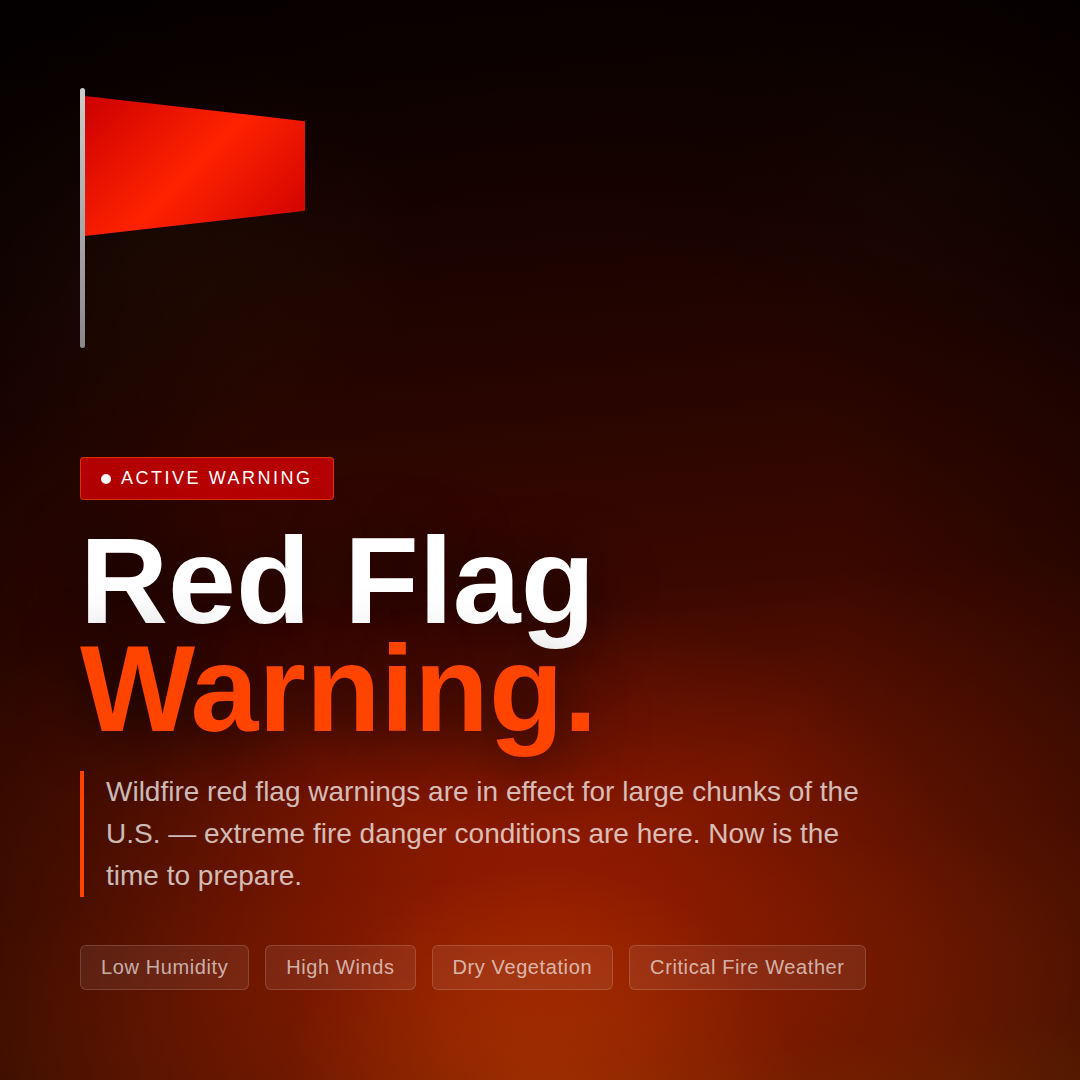
Right now, Red Flag Warnings are stretching across a massive portion of the central United States—from Texas all the way up to the northern border states. Millions of acres across states like Florida, New Mexico, Colorado, Kansas, Nebraska, and the Dakotas are under conditions where one spark could turn into a fast-moving wildfire.
This is widespread. It’s active. And it matters.
So… What Is a Red Flag Warning?
A Red Flag Warning means fire conditions are critical.
Not “maybe someday.”
Not “keep an eye on it.”
It means the environment is primed for fires to start easily and spread quickly.
Here’s what’s happening behind the scenes:
Low humidity is drying everything out
Strong winds can push flames rapidly across land
Dry vegetation becomes instant fuel
Put it all together, and you have a situation where even a small, everyday spark can escalate fast.
This Is Bigger Than Just Fire
When people think about wildfires, they think about forests but the impact goes far beyond that.
These conditions threaten:
Homes and communities
Farms and livestock
Food production and supply chains
Infrastructure and local economies
We’re already seeing the ripple effects—damage to land, stress on agriculture, and rising costs that eventually hit all of us.
This is how weather turns into real-world consequences.
What You Should Be Doing Right Now
A Red Flag Warning is not passive information—it’s a signal toreduce risk immediately.
Here’s what that looks like in real life:
Avoid anything that could spark a fire
Skip outdoor burning
Be cautious with tools or equipment
Never toss cigarettes outside
Be aware of your surroundings
Clear dry debris near your home
Pay attention to local updates
Think twice before doing anything that involves heat or friction outdoors
Have a basic plan
Know how you would leave if needed
Keep essential items accessible
Stay connected to alerts in your area
Prepared, Not Panicked
This isn’t about fear—it’s about awareness.
Red Flag Warnings are one of those signals that many people overlook… until it’s too late.
But the reality is simple: The conditions for disaster don’t start when the fire does—they start long before.
And the people who are prepared? They’re the ones who saw the signs early and took small steps that made a big difference.
Start where you are today. Small steps now create real security later and peace of mind.
SHARE this info with family, friends and neighbors. Be sure to FOLLOW along for practical, no-overwhelm ways to get prepared.
Wildfire Mitigation & Preparedness: How to Protect Your Home and Family
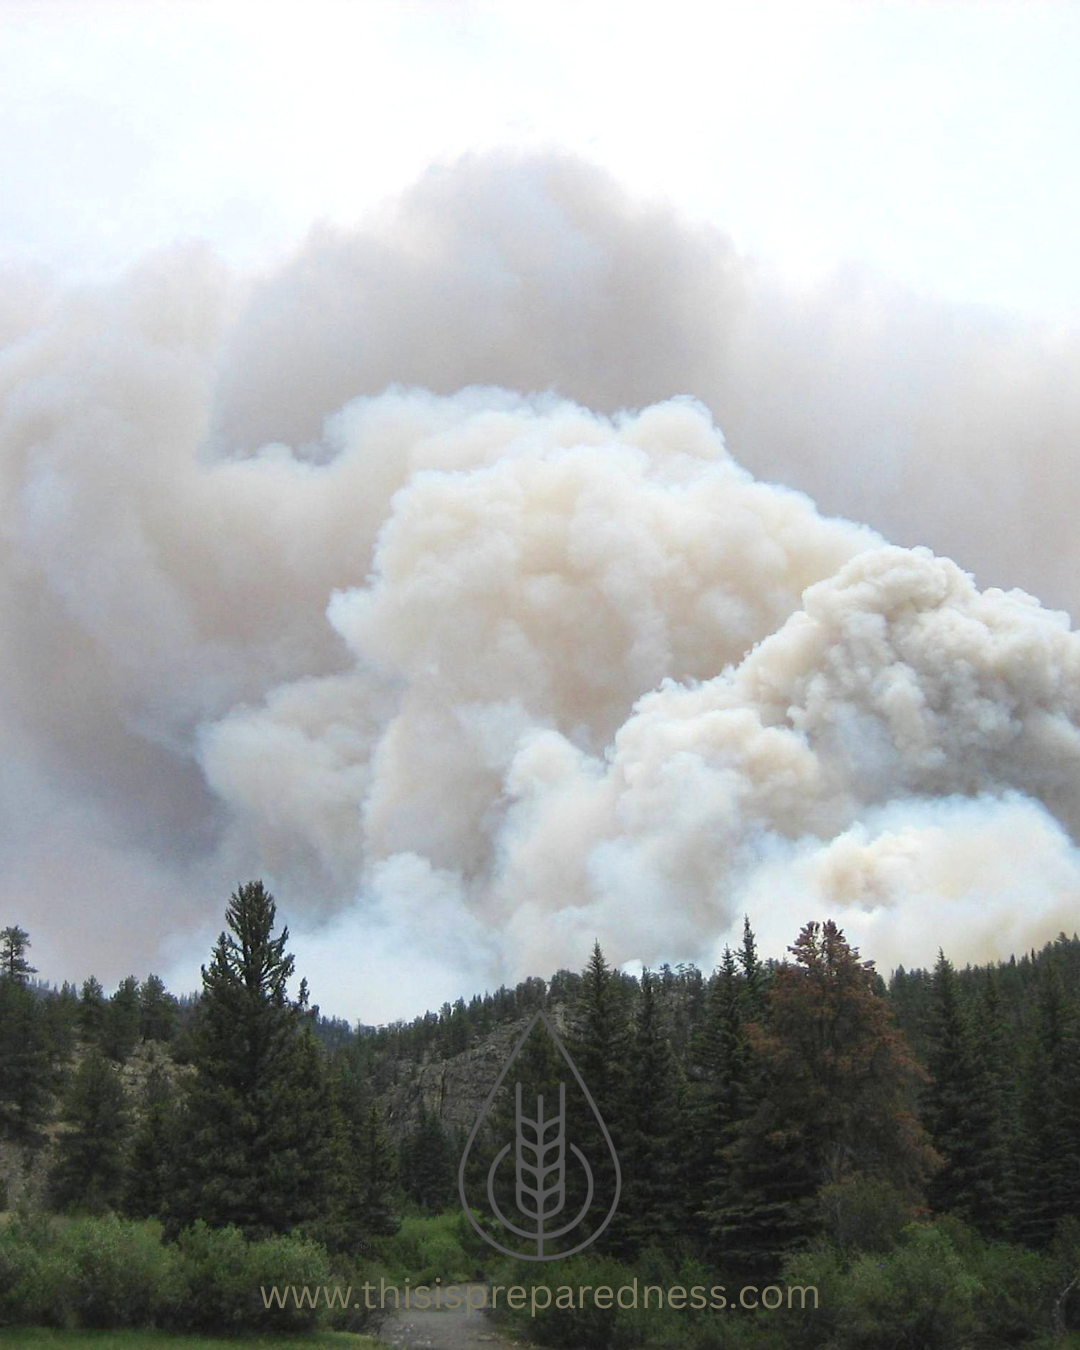
Wildfires aren’t just a “Western states” problem anymore—they’re becoming a growing threat in more areas each year, especially as drought conditions intensify. The good news? There is a lot within your control. The difference between loss and protection often comes down to the steps you take before a fire ever starts.
Why This Matters More Than Ever
Nearly 90% of the U.S. is facing extreme to critical drought conditions.
Whether it’s natural cycles or poor management of our resources, the impact is already unfolding—damage to homes and property, and the destruction of vital farmland and livestock. And it doesn’t stop there. As farmland burns, so does a portion of our food supply… leading to food scarcity and rising prices in the months ahead.
It’s easy to feel overwhelmed reading that.
But this is not the time to panic.
This is the time to prepare and protect.
The good news? There is a lot you can do right now to be a better steward of your home, your resources, and your family’s safety.
Wildfire Mitigation: Protect Your Home Before a Fire Starts
Create Defensible Space
One of the most effective ways to protect your home is by creating a buffer between it and surrounding vegetation.
Start here:
Clear dead leaves, pine needles, and debris within at least 30 feet of your home
Trim tree branches 6–10 feet from the ground
Space trees so their canopies don’t touch
Move firewood, propane tanks, and flammable materials at least 30 feet away
Harden Your Home
When embers travel (and they will), your home needs to be ready.
Focus on:
Cleaning gutters regularly—dry debris is fuel
Installing ember-resistant vents or mesh coverings
Using fire-resistant roofing or siding when possible
Sealing gaps around doors, windows, and rooflines
Maintain Your Yard
Your landscaping plays a major role in fire behavior.
Keep grass short and maintained
Remove dead or dying trees and shrubs
Avoid bark mulch near your home—opt for gravel or stone
Eliminate “ladder fuels” by pruning low branches
Be Smart with Fire Sources
Many wildfires start from preventable causes.
Avoid outdoor burning on dry or windy days
Keep grills and fire pits far from structures
Store fuels safely and away from heat
Wildfire Preparedness: Be Ready If a Fire Happens
Build a Go-Bag (Your 72hr kit-with some additional supplies)
If you need to leave quickly, preparation is everything.
Include:
3 days of food and water per person
Important documents in a waterproof bag
Medications and a basic first aid kit
Flashlights, batteries, and chargers
Extra clothing and sturdy shoes
N95 masks for smoke protection
Create an Evacuation Plan
In an emergency, clarity saves time—and time saves lives.
Know at least two ways out of your neighborhood
Choose a meeting place for your family
Practice leaving quickly
Plan for pets and livestock ahead of time
Stay Informed
Awareness gives you an advantage.
Sign up for local emergency alerts
Monitor weather conditions regularly
Watch for Red Flag Warnings
Prepare Your Vehicle
Keep your gas tank at least half full
Store an emergency kit in your car
Know evacuation routes beyond your immediate area
When a Wildfire Is Nearby
If a fire is approaching, don’t wait until the last minute.
Bring outdoor items inside (furniture, doormats, etc.)
Close all windows and doors, but leave them unlocked
Turn off gas if instructed
Be ready to evacuate early
Prepared, Not Panicked
This all may sound serious—because it is.
But preparedness isn’t about fear. It’s about taking control, reducing risk, and protecting what matters most.
You don’t have to do everything today. Start with one step. Then another.
And don’t keep this information to yourself!
SHARE it with your family, your friends, and your neighbors. The more prepared we are together, the stronger and safer our communities will be.
Weeks 1–4 Recap: Building Your 72-Hour Kit Foundation
72 Hr Kit 10-Week Challenge
If you’ve been following along with our 10-Week 72-Hour Kit Challenge, you’ve already taken some powerful steps toward protecting your home and your family.
Before we move forward, let’s take a moment to recap Weeks 1–4—because what you’ve built so far is the foundation of your preparedness plan.
And if you’re just joining now, this is the perfect place to jump in.
Week 1: Water — Your Most Critical Resource
We started with the most essential need: water.
The goal was simple—make sure your family has enough clean water to last at least 72 hours.
What you should have by now:
1 gallon of water per person, per day (minimum)
Water stored in clean, food-safe containers
A plan for water refills or purification, if needed
Water is often the first resource to become limited in an emergency. By prioritizing this first, you’ve already taken a major step toward readiness.
Week 2: Food — Simple, Practical, Ready-to-Go
Next, we focused on building a 3-day food supply for your household.
This wasn’t about perfection—it was about practicality.
What you worked on:
Creating a simple 3-day meal plan
Choosing shelf-stable, easy-to-prepare foods
Shopping smart (store brands, dollar stores, sales)
Think grab-and-go, minimal cooking, and foods your family will actually eat.
Week 3: Planning — Know What to Do Before You Need To
Week 3 was all about having a plan.
Because in an emergency, confusion wastes time—and time matters.
You should now have:
A basic family evacuation plan
Designated meeting locations
Communication plans if separated
Awareness of local evacuation routes
This step is often overlooked, but it’s one of the most important. A clear plan reduces panic and helps your family act quickly and confidently.
Week 4: Clothing & Shelter — Protecting Against the Elements
In Week 4, we focused on what your family will wear and how you’ll stay protected if you need to leave quickly.
You worked on:
Packing weather-appropriate clothing for each family member
Including 3 days’ worth of changes
Adding rain gear or ponchos, if needed
Thinking through shelter basics depending on your environment
Preparedness isn’t just about survival—it’s about staying as safe and comfortable as possible in uncertain conditions.
Why This Matters
Each week may have felt small—but together, you’ve already built something incredibly important.
You now have:
Water
Food
A plan
Basic clothing and shelter
That’s not just a kit—that’s peace of mind.
Keep Going
If you’re feeling behind, don’t quit. Just pick one area and start.
If you’ve been following along, take a moment to check your progress and fill in any gaps.
Preparedness is not about doing everything perfectly—it’s about doing something consistently.
We’re building this one step at a time, together.
Week 5 is where we begin focusing on medical supplies and critical documents—and it’s a big one.
You’re doing better than you think. Keep going!
It's Not If. It's When.
Tornadoes. Wildfires. Winter storms. Flooding. The question isn't whether disaster will strike — it's whether you'll be ready when it does.
In recent months alone, we've seen tornadoes tear through communities, wildfires consume entire neighborhoods, brutal winter storms knock out power for days — and most recently, devastating flooding across Hawaii. Add to that the droughts and wild weather rippling across the globe, and the pattern is impossible to ignore.
Being prepared is no longer optional. It's one of the most caring things you can do for yourself and your family.
This Isn’t About Fear—It’s About Peace
That's why today we're kicking off Week 1 of the 10-Week 72-Hour Kit Challenge — a simple, manageable program to build real emergency preparedness, one week at a time. And here's what makes this challenge different from anything you've tried before:
We're building two things at once.
72-Hour Kit
Everything your family needs to survive and stay safe for 72 hours — built up gradually, week by week, so it never feels overwhelming.
Grab & Go Binder
Your most critical documents — IDs, insurance, medical records — all in one place, ready to grab in seconds when every second counts.
Think of the 72-hour kit as your safety net — the supplies, food, and gear your household would need if you had to shelter in place or evacuate on short notice. And the Grab & Go Binder? That's the piece most people overlook. In a real emergency, being able to prove who you are, access your insurance, or show a loved one's medical history can matter just as much as having water and food on hand.
Together, these two areas cover you from every angle. And because we're tackling them over 10 weeks, you only need to take one small step at a time.
Ready to start Week 1?
WHAT DO YOU NEED TO DO?:
Print this week's challenge sheet Click this link to get access to WEEK ONE
Follow along each week as we build both area together
Share with friends, family, and neighbors — the more prepared your circle, the stronger your whole community
A little each week adds up to a stronger, calmer, more prepared home. Nine more weeks from now, you'll have a complete kit, a complete binder, and the confidence that comes with knowing you're truly ready.
Let’s Build Preparedness Together!
Fuel Preparedness: Practical Ways to Save Gas When Prices Rise
When gas prices climb, most people feel it immediately. Every trip to the store, school drop-off, or commute suddenly costs more. While we can’t control the price at the pump, we can control how efficiently we use fuel.
Preparedness isn’t only about storing supplies for emergencies. It’s also about building everyday habits that protect your family’s finances and increase your resilience when prices or supply become uncertain. Fuel preparedness is one of those often-overlooked areas of self-reliance.
Here are some simple ways to stretch every gallon and stay one step ahead.
1. Combine Trips Whenever Possible
One of the easiest ways to save gas is reducing the number of times you start your vehicle.
Instead of making several short trips throughout the week, try to group errands together into one outing. For example, schedule grocery shopping, pharmacy pickups, and other errands during the same trip.
Cold engines use significantly more fuel, so fewer start-ups can make a noticeable difference over time.
2. Maintain Proper Tire Pressure
Underinflated tires create more resistance on the road, which forces your vehicle to use more fuel.
Check your tire pressure at least once a month. Many gas stations offer free air, and it only takes a few minutes. Properly inflated tires can improve gas mileage and extend the life of your tires at the same time.
3. Drive Smoothly and Steadily
Aggressive driving wastes fuel.
Rapid acceleration and sudden braking can reduce fuel efficiency by a surprising amount. Instead, accelerate gently, maintain a steady speed, and look ahead so you can slow down gradually when needed.
Not only does this save gas, but it also reduces wear on your vehicle.
4. Use Cruise Control on Highways
When driving on the highway, cruise control helps maintain a consistent speed.
Constant speed prevents the small fluctuations in acceleration that naturally happen when driving manually. Over long distances, this can help conserve fuel and make your drive more efficient.
5. Remove Unnecessary Weight
Many people carry items in their vehicles that they rarely use. Extra weight forces the engine to work harder, which increases fuel consumption.
Take a few minutes to remove heavy items that aren’t necessary for everyday driving.
6. Avoid Excessive Idling
Letting your car idle for long periods wastes fuel without getting you anywhere.
If you’re waiting for more than a minute or two, turning off the engine can help conserve gas. Modern engines don’t require long warm-up times, so idling isn’t usually necessary.
7. Keep Your Fuel Tank Above Half
One preparedness habit that many people practice is keeping their gas tank at least half full.
This simple rule helps you stay ready for unexpected situations such as power outages, evacuation needs, or sudden fuel shortages. It also reduces the stress of running low on fuel during a busy week.
Fuel Preparedness Is Part of Self-Reliance
Preparedness isn’t only about having a 72-hour kit or storing food. It’s also about everyday wisdom and small habits that build resilience over time.
When we pay attention to how we use our resources—fuel included—we create more stability for our families. Small changes today can protect both your budget and your readiness for tomorrow.
Preparedness is not about fear.
It’s about living wisely, planning ahead, and creating peace of mind for whatever comes next.
How to Build a Winter Car Emergency Kit: Stay Safe, Warm & Ready
When winter rolls in, even everyday errands can turn unpredictable. Snow, icy roads, sudden wind chills, or a stalled engine can quickly turn a simple drive into a stressful situation. Having a winter car emergency kit isn’t about being fearful — it’s about being wise, prepared, and confident no matter where the road takes you.
Whether you live somewhere with heavy snowfall or you’re simply traveling through colder areas, a well-stocked winter kit can turn a potential emergency into a manageable inconvenience. Here’s everything you need to know to build one that truly supports your family.
Why a Winter Car Emergency Kit Matters
Cold weather adds a layer of risk to any unexpected situation on the road. If you get stuck, break down, or need to pull over and wait for help, staying warm and having basic supplies on hand becomes essential.
A good winter kit helps you:
Stay warm if the heat goes out
Signal for help
Handle minor car issues
Provide basic first aid
Keep everyone calm and comfortable until help arrives
It’s peace of mind in a tote bin — and it’s a simple step toward self-reliance.
Winter Car Emergency Kit Checklist
Below is a complete list of items to keep in your vehicle from November through early spring. Adjust quantities based on the number of people you typically travel with.
Warmth & Clothing
Thermal blankets or emergency mylar blankets
Extra hats, gloves, and scarves
Wool socks
Hand warmers (air-activated or reusable)
Small fleece blanket
Waterproof poncho
Car-Related Essentials
Jumper cables or a portable jump starter
Tire pressure gauge
Ice scraper & snow brush
Small folding shovel
Traction aids (sand, kitty litter, or traction boards)
Spare tire, jack, and tire iron
Windshield washer fluid (winter formula)
Flashlight + extra batteries
Reflective triangles or road flares
Emergency & First Aid Items
First aid kit (bandages, antiseptic, gauze, tweezers, gloves)
Emergency whistle
Multi-tool
Emergency phone charger / power bank
Paper map (in case GPS fails)
Basic medications (ibuprofen, antihistamine, etc.)
Food & Water
Bottled water (swap out monthly so it doesn’t freeze)
Electrolyte packets
High-energy snacks:
Granola bars
Trail mix
Dried fruit
Nuts
Shelf-stable protein sources (jerky or vegan equivalents)
Comfort & Personal Care
Small pack of tissues
Wet wipes
Trash bags
Chapstick
Lotion (cold air dries the skin fast)
Notepad & pen
Spare phone charging cable
Bonus Items That Make a Big Difference
These aren’t required but make your winter kit next-level useful:
Small battery-powered heater (vehicle-safe)
Emergency seatbelt cutter + window breaker
Backup pair of shoes or boots
Small fire extinguisher
Glow sticks for nighttime visibility
Extra water-resistant tote to keep everything organized
*TIPS for Keeping Your Kit Ready
A kit only helps if it’s maintained! Here’s how to keep yours dependable all season long:
Check snack expiration dates every few months
Make sure batteries still work
Rotate water so it doesn’t freeze
Charge the power bank at least once a month
Restock anything you used
Store everything in an easy-to-reach tote, bag, or bin
Final Thoughts
Creating a winter car emergency kit is one of the simplest, most practical steps you can take to protect your family. It only takes an hour to put together, and once it’s done, you’ll feel more confident every time you get behind the wheel. Preparedness isn’t complicated — it’s just intentional.
Winter Preparations: A Simple Guide to Staying Warm, Safe & Ready
Winter Preparations: A Simple Guide to Staying Warm, Safe & Ready
As the air turns crisp and the days grow shorter, winter reminds us that preparation is peace. Whether you live where snow blankets the ground or where cooler breezes roll in off the coast, getting ready ahead of time helps protect your home, your health, and your sense of calm. Let’s walk through a simple, practical approach to winter readiness — from home and pantry prep to self-care and community awareness.
1. Prepare Your Home
Seal in the warmth, keep out the chill.
Inspect doors and windows: Check for drafts and use weatherstripping or caulk to seal gaps.
Clean gutters: Prevent ice dams and water damage by clearing out leaves and debris.
Protect your pipes: Wrap exposed pipes with insulation sleeves and let faucets drip slightly during freezing temps to avoid bursts.
Test your heating system: Replace filters, schedule a tune-up, and make sure carbon monoxide detectors are working.
Stock firewood or alternative heat sources: If you rely on wood heat, stack and cover your supply. Have backup options like propane heaters or solar blankets in case of power outages.
* TIP: Close doors to unused rooms and use thick curtains to retain heat in main living spaces.
2. Pantry & Food Storage
A well-stocked pantry is your best insurance policy.
Whether you follow a plant-based, gluten-free, or traditional diet, the goal is the same — store foods that nourish, comfort, and sustain your family if supply chains slow or weather keeps you home. Plan for at least two weeks of shelf-stable options your household actually eats.
Pantry Basics for Everyone
Grains & Starches: oats, rice, quinoa, pasta (choose regular, gluten-free, or grain-free options)
Legumes: beans, lentils, split peas — affordable, high-protein, and shelf-stable
Proteins:
Plant-based: nuts, seeds, nut butters, shelf-stable plant milks, protein powder
Animal-based: canned chicken, salmon, tuna, jerky, bone broth packets
Fruits & Veggies: canned, frozen, or dehydrated options for easy meals and smoothies
Healthy Fats: olive oil, coconut oil, ghee, avocado oil, and canned coconut milk
Comfort & Convenience
Soup mixes, stews, or instant meals that fit your dietary needs
Baking supplies: flour (regular, oat, almond, or gluten-free blends), sugar or natural sweeteners, baking powder, yeast
Snack items: trail mix, granola, crackers, dried fruit, popcorn kernels
Warm drinks: herbal teas, coffee, cocoa, and electrolyte packets
Other Essentials
Water storage: At least one gallon per person per day
Cooking supplies: Manual can opener, matches, camp stove or grill with extra fuel
Seasonings & condiments: Salt, pepper, spices, sauces, and vinegar add flavor variety to simple meals
* TIP: Label your shelves by category and rotate stock regularly — use what you store and store what you use. It keeps everything fresh and familiar when you need it most.
3. Power & Lighting
Winter storms often mean power outages. Plan ahead for light and warmth.
Flashlights & headlamps: Keep extras in every main room.
Batteries & chargers: Rechargeable batteries and solar or hand-crank chargers are invaluable.
Candles & lanterns: Keep them handy (and never leave unattended).
Generator (optional): If you have one, test it now and store fuel safely.
* TIP: Store all your backup lighting together in one clearly labeled tote for quick access.
4. Vehicle Preparedness
Cold weather can make travel unpredictable.
Winterize your car: Check antifreeze, battery, brakes, and tires.
Emergency car kit: Include blankets, snacks, water, jumper cables, first aid supplies, flashlight, and a small shovel.
Keep the tank half full: Prevent frozen fuel lines and ensure you can run the heater if stranded.
* TIP: Keep a bag of kitty litter or sand in the trunk for traction if you get stuck on ice.
5. Clothing & Warmth
Layering is key to staying comfortable and dry.
Base layer: Moisture-wicking material (avoid cotton).
Middle layer: Insulating fabrics like wool or fleece.
Outer layer: Waterproof and windproof.
Don’t forget hats, gloves, scarves, and thermal socks.
* TIP: Keep a small “warmth kit” with extra socks, gloves, and hand warmers in your vehicle and go-bags.
6. Mild-Winter & Southern Climate Preparations (Florida & Similar Regions)
Even without snow, cooler months in places like Florida bring their own preparedness needs. You may not be shoveling snow, but being winter-ready still means protecting your home, health, and supplies.
Here’s what to focus on:
Cold snaps do happen: Keep a few extra blankets, space heaters (safely used), and draft stoppers for chilly nights.
Power outages & storms: Winter fronts can still bring high winds or heavy rain. Have flashlights, extra batteries, and a backup cooking source ready.
Garden & homestead care: Protect tender plants and fruit trees with frost cloths or old sheets during cold warnings.
Pest control: Cooler weather drives rodents and insects indoors — check for gaps in your walls or under doors.
Water systems: If temps drop near freezing, insulate exposed outdoor pipes and faucets.
Hurricane off-season review: Winter is the perfect time to restock your storm supplies, organize emergency binders, and update family plans before next hurricane season.
Community readiness: Use the slower winter months to connect with neighbors, build local networks, and share preparedness ideas.
* TIP: In mild climates, focus less on snow and more on system resilience — power, water, food, and community.
7. Health & Wellness
Winter can be tough on the body and mind. Prepare to nourish yourself.
Stock natural remedies: Elderberry, echinacea, vitamin C, zinc, and herbal teas for immune support.
Humidify indoor air: Prevent dry skin and sinus issues.
Move daily: Even gentle stretching or walks boost circulation and mood.
Stay connected: Check on neighbors, especially the elderly or those living alone.
* TIP: Create a cozy evening ritual — warm tea, soft lighting, and gratitude journaling — to ease seasonal stress.
8. Emergency Supplies Checklist
Keep a bin or shelf labeled “Winter Emergency Kit” with:
Blankets or sleeping bags
First aid kit
Battery-powered radio
Extra medications
Matches or lighters
Multi-tool
Water purification tablets
Copies of important documents
* TIP: Review your kit at the start of every season and adjust for changing needs.
9. Mindset & Preparedness Spirit
Preparedness isn’t about fear — it’s about stewardship.
When you’re ready for the cold, you can focus on what winter truly offers: stillness, reflection, family closeness, and gratitude for warmth and shelter. A little preparation turns worry into confidence and chaos into calm.
Winter readiness doesn’t have to be complicated. Start small — one room, one system, one supply category at a time. Before you know it, you’ll have created a safe, warm, and peaceful refuge from the storm.
When we prepare in advance, we can truly rest in the season — sipping cocoa, watching the snow fall, and knowing we’ve done our part.
Final Thoughts
Winter readiness doesn’t have to be complicated — whether you’re bracing for snow in the mountains or enjoying a Florida “sweater season.” Start small — one system, one room, one category at a time. Before you know it, you’ll have created a safe, calm refuge ready for whatever this season brings.
When we prepare in advance, we can truly rest in the season — sipping cocoa, walking the shoreline, or sitting by the fire — knowing we’ve done our part.
Start a Garden, Start Your Self-Reliance Journey
If there’s one thing I’ve learned over the past few years, it’s that self-reliance isn’t built overnight — it’s cultivated. Just like a garden.
If there’s one thing I’ve learned through this journey of preparedness and self-reliance, it’s that you don’t have to be an expert to start. Self-reliance isn’t built overnight — it’s cultivated. Just like a garden.
Starting a garden — even a small one — is one of the most practical and empowering steps you can take toward self-reliance. It doesn’t matter if you’ve never grown a thing in your life. You can start right where you are, with what you have.
I’ll be honest — I’m no master gardener. I’ve had plants thrive and others that never stood a chance. I’ve learned (sometimes the hard way) that gardening takes patience, consistency, and a little bit of faith. But through it all, I’ve realized something beautiful: the process is just as important as the harvest.
Each season teaches something new. You’ll notice which plants love your soil, when to water more or less, and what pests to look out for. And somewhere in between the planting, watering, and waiting — you’ll start to feel more connected to your food, your land, and your purpose.
In a world where so much feels uncertain, gardening reminds us that we can take simple steps to care for ourselves and our families. Growing even a little of your own food builds confidence, peace of mind, and a deep sense of gratitude for the earth’s abundance.
So, if you’ve been thinking about starting a garden, don’t wait for spring or the “perfect time.” The best time to start is NOW. Pick up a few seed packets, plant some herbs, or start composting. Learn as you go. Stick with it. It will be worth it — I promise.
Because self-reliance isn’t about perfection. It’s about being willing to begin.
Emergency Water Preparation: How Much, How to Store, and Why It Matters

When we think about preparedness, water is the very first thing that should come to mind. We can survive weeks without food — but only a few days without water. In every disaster, from hurricanes to power outages, clean water quickly becomes one of the most valuable resources.
Preparing now means peace later — knowing your family will have what they need when the unexpected happens.
How Much Water to Store
The general rule from FEMA and preparedness experts is:
One gallon of water per person per day.
½ gallon for drinking
½ gallon for cooking, cleaning, and hygiene
For a 3-day (72-hour) emergency kit, that’s 3 gallons per person.
But ideally, aim for a two-week supply, which is 14 gallons per person.
If you have pets, add:
1 gallon per day for large pets (dogs, goats, etc.)
½ gallon per day for small pets (cats, chickens, etc.)
TIP: Once you’ve built your 3-day supply, slowly work toward a 2-week reserve. Small, steady steps add up fast!
The Best Ways to Store Water
Here are a few safe and simple options for different spaces and budgets:
1. Commercial Bottled Water
Easiest and most accessible option.
Store unopened bottles in a cool, dark place.
Replace every 1–2 years (check expiration dates).
2. Food-Grade Water Containers
Use BPA-free, food-safe plastic or stainless steel containers.
Common sizes: 5–7 gallon jugs or stackable cubes.
Rinse thoroughly, sanitize with a teaspoon of bleach per quart of water, then fill with clean tap water.
Label with the date and rotate every 6–12 months.
3. Water Barrels or Large Drums (for long-term storage)
15–55 gallon barrels are perfect for families or homesteads.
Store on a wooden platform (not directly on concrete).
Use water preserver drops to keep it fresh for up to 5 years.
4. Portable Water Options
Collapsible water containers or pouches for evacuation kits.
Water filter straws (like LifeStraw or Sawyer Mini) for purification on the go.
Where to Store Your Water
Cool, dark location (ideally 50–70°F).
Avoid direct sunlight and garages that get hot.
Keep containers sealed and off the floor to prevent chemical leaching or damage.
Get Started TODAY
If you haven’t started your water prep yet, begin today!
Grab a few gallon jugs at the grocery store or fill some clean containers at home. Each one brings you one step closer to self-reliance and peace of mind.
Final Thoughts
Preparedness isn’t about fear — it’s about love in action.
Every jug you fill is an act of care for your family, your neighbors, and your peace of mind.
When the storm comes — whether literal or figurative — you’ll know you’ve already done your part to keep your loved ones safe and cared for.